

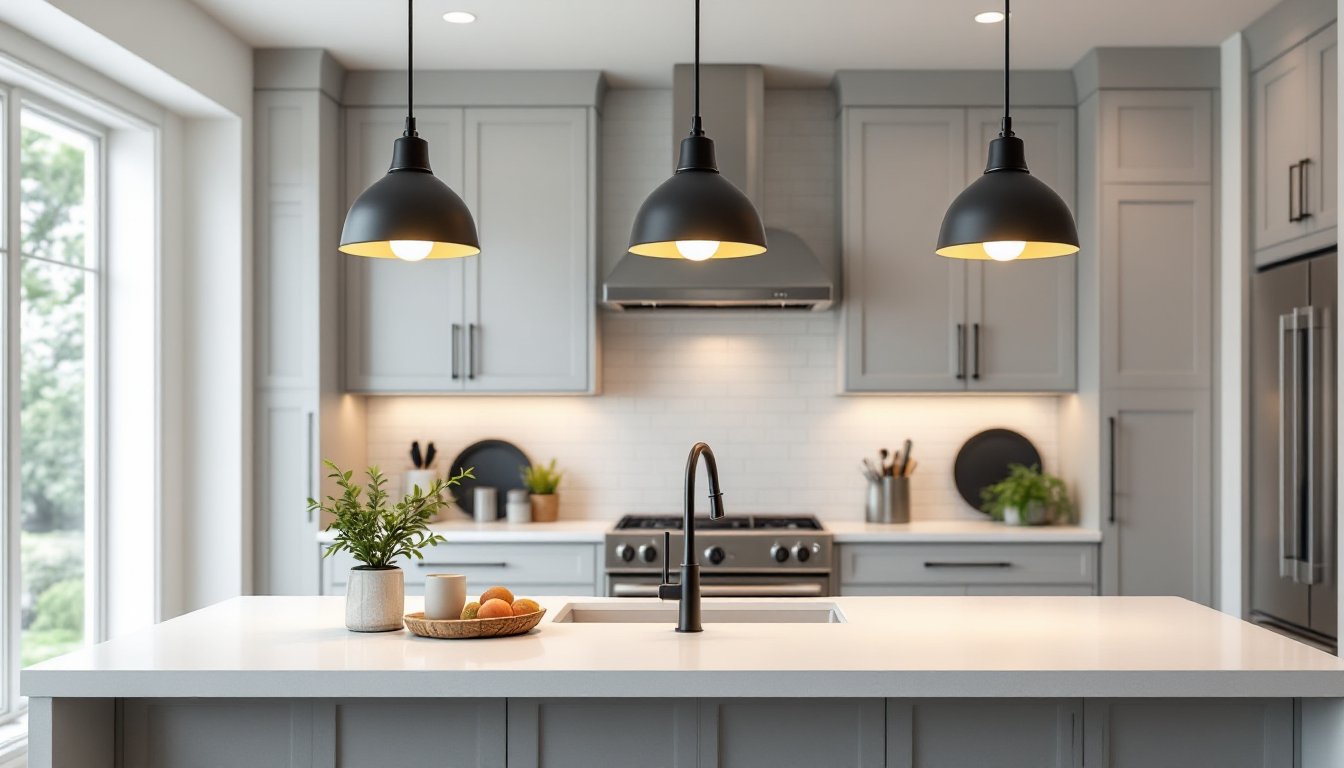

Kitchen islands have become the hub of modern homes, a place for cooking, eating, assignments, and gathering. Getting the lighting right over that island can make or break both the functionality and aesthetics of your kitchen. Over island pendant lighting isn’t just decorative: it provides task lighting for meal prep, creates visual interest, and sets the mood for the entire space. Whether you’re renovating from scratch or updating dated fixtures, this guide walks you through selecting the right pendants and installing them safely so your island becomes a well-lit, stylish focal point.
Key Takeaways
- Over island pendant lighting serves dual purposes—providing essential task lighting for food prep while acting as a visual design anchor that elevates your kitchen’s aesthetic.
- Proper sizing matters: each pendant should be one-quarter to one-third the width of your island, hung 30–36 inches above the countertop to ensure both safety and effective illumination.
- Match pendant finishes to existing kitchen hardware or intentionally introduce a contrasting accent finish that appears elsewhere in the space for cohesive design.
- Install one large pendant for islands under 4 feet, two matching fixtures for 4–6 foot islands, or three pendants for islands 6+ feet, spaced 30–36 inches apart center to center.
- Before installation, confirm your island has proper electrical wiring and a dedicated 20-amp circuit with GFCI protection—hire a licensed electrician if unsure about any wiring work.
- Hang island pendant lights with fixtures rated for weight, ensure all wire connections are secure with wire nuts and electrical tape, and test bulbs using the wattage specified on the fixture label.
Why Over Island Pendant Lighting Transforms Your Kitchen
Pendant lights hanging above a kitchen island serve multiple purposes that go beyond simple decoration. They illuminate the work surface directly below, making food prep safer and easier. Unlike overhead ceiling fixtures that can cast shadows, properly positioned pendants eliminate dark spots where you’re chopping or mixing. They also establish a visual anchor, a design focal point that draws the eye and makes the island feel intentional and designed, not like an afterthought.
From a practical standpoint, pendant fixtures allow you to adjust brightness through dimmer switches and bulb selection, giving you flexibility for different tasks and times of day. A bright white light works for cooking: warm amber tones invite family to linger during dinner. Task lighting over the island also means you don’t need to rely solely on your main ceiling fixture, reducing energy use and giving you more control.
Design-wise, pendants are one of the easiest ways to inject personality into a kitchen. A single statement pendant or a trio of matched fixtures can tie together your kitchen’s style, whether that’s industrial, farmhouse, mid-century modern, or contemporary minimalist. Expert recommendations and styling tips for selecting pendant lights show that the right fixtures elevate a basic island into a polished, intentional design element.
Choosing the Right Style and Design for Your Space
Popular Styles That Work Best Over Kitchen Islands
Modern and contemporary kitchens often pair minimalist pendant designs, think clean-lined metal globes, geometric shapes, or sleek cylinders, with stainless steel or matte black finishes. These styles complement modern cabinetry and appliances without competing for attention. Industrial-style pendants feature exposed filament bulbs, metal cages, or raw metal finishes that work beautifully in lofts, open-concept kitchens, or spaces with concrete and brick accents.
Farmhouse and transitional kitchens benefit from glass pendants (often with a slight vintage patina), wrought iron fixtures, or cage-style designs that feel approachable without being trendy. Brass and copper finishes have returned to favor and pair well with warm wood tones and neutral cabinetry. If you’re unsure about your kitchen’s style, a curated collection of kitchen island pendant lighting designs offers visual inspiration across multiple aesthetics.
One key rule: your island pendants should either echo finishes already present in your kitchen (cabinet hardware, faucet, light fixtures) or introduce a deliberate accent finish that feels intentional. Matching your pendant metal to your cabinet pulls and faucet creates cohesion: introducing a contrasting metal (like brass on a chrome kitchen) is fine if it appears in at least one other element.
Sizing and Scale Considerations
Pendant size matters. Fixtures that are too small look lost: too large and they overwhelm the island and block sightlines. A general rule: each pendant should be roughly one-quarter to one-third the width of your island. For a 4-foot island, expect 8–12 inch diameter pendants. For a 5–6 foot island, 12–15 inch fixtures typically work best.
Height also impacts both safety and aesthetics. Hang pendants 30–36 inches above the countertop surface to allow comfortable head clearance for someone standing at the island. Too low and they obstruct views and risk head bumps during tall-plate service: too high and task lighting becomes ineffective. If your island has a raised bar overhang (typically 12–15 inches), measure down from the underside of that overhang and aim for roughly 18–24 inches of clearance above the bar seating surface.
For island length, install one large pendant over shorter islands (under 4 feet), a pair of matching fixtures for medium islands (4–6 feet), or three smaller pendants for longer islands (6+ feet). Spacing between fixtures is typically 30–36 inches apart, center to center. Kitchen design ideas and solutions from established resources frequently showcase how proportion and spacing create visual balance.
Installation Essentials and Safety Tips
Before you start, confirm your island has electrical wiring in place. If there’s no junction box in the ceiling directly above the island, or if wiring hasn’t been run yet, this is a job for a licensed electrician, don’t DIY electrical rough-in work. Building codes vary by jurisdiction, but most require that island circuits be on a dedicated 20-amp circuit with GFCI protection.
Gather these materials: the pendant fixtures, 12/2 electrical wire (if rewiring), a mounting bracket (usually included), ¾-inch threaded rod or chain (depending on hanging style), wire nuts, electrical tape, and a 4-inch or 6-inch junction box rated for the fixture weight. Check your fixture’s wattage and ensure your circuit can handle the total load.
Step 1: Turn off power at the breaker and use a non-contact voltage tester to confirm the circuit is dead. Even if you’re just hanging pre-wired fixtures, this is non-negotiable.
Step 2: Locate and mark hanging points. Use a tape measure and level to find the center of your island. For multiple pendants, mark each spot, spacing them 30–36 inches apart. A laser level or chalk line helps keep marks straight.
Step 3: Install the mounting bracket. Remove the old fixture (if replacing) or install a new junction box if adding pendants to a blank ceiling. The bracket bolts to the electrical box and must be rated for the combined weight of all hanging fixtures plus the chain or rod. Most brackets are rated for 50 pounds or more, but confirm yours matches your fixture weight.
Step 4: Route and connect wiring. This step depends on whether fixtures are pre-wired and hardwired vs. plug-in. For hardwired fixtures, black (hot), white (neutral), and bare copper (ground) wires from the fixture connect to matching wires from your circuit using wire nuts. Twist wires together, then screw the nut on clockwise until tight. Wrap the connection with electrical tape for safety. If using a chain, it can be decorative: wiring runs inside a hollow chain or inside the pendant itself to the bulb socket.
Step 5: Hang the fixtures. Thread the rod or chain through the mounting bracket and secure according to the fixture’s design (usually a locking nut or setscrew). Adjust height so pendants hang 30–36 inches above the countertop. Ensure fixtures hang plumb (straight, not tilted) using a level.
Step 6: Install the canopy. The decorative canopy covers the junction box and mounting hardware. Tighten it snugly but don’t over-torque, which can crack glass or damage finishes.
Step 7: Install bulbs and test. Use the wattage specified on the fixture label, never exceed it. LED bulbs are energy-efficient and generate less heat. Restore power and test all fixtures. If one doesn’t work, double-check wire connections and bulb seating.
Safety essentials: Wear safety glasses when working overhead: tools and parts can fall. A dust mask is wise if accessing ceilings with old insulation. If wiring runs through walls or cavities, use a stud finder first to avoid live wires. If at any point you’re unsure about electrical connections, call a licensed electrician. A 2-hour service call beats a house fire.
Conclusion
Over island pendant lighting is a practical upgrade that pays dividends in both function and style. Taking time to select fixtures that match your kitchen’s aesthetic, sizing them appropriately for your island, and installing them safely ensures you’ll enjoy years of well-lit, beautiful workdays. Start with your style and scale, verify your electrical setup, and don’t hesitate to bring in a professional for the parts that require it. Your island, and your kitchen, will thank you.