

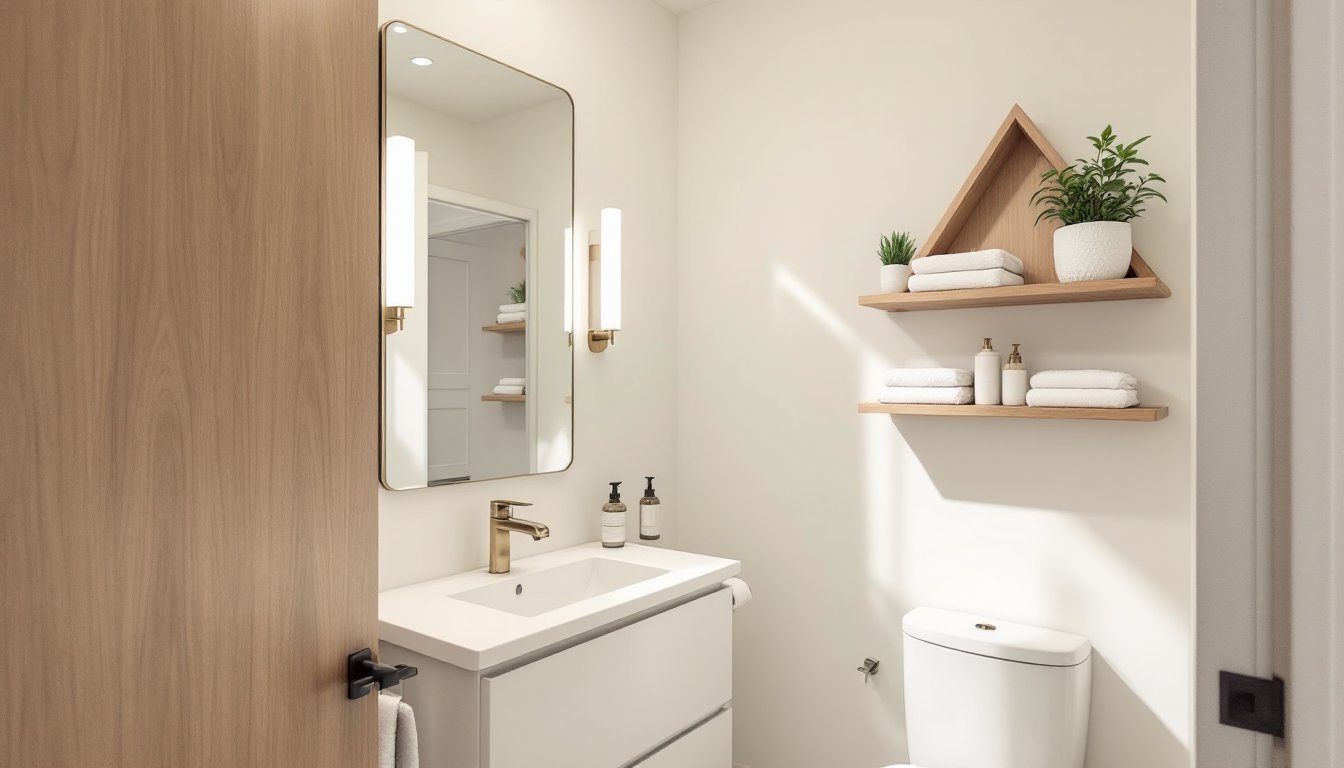

Living small doesn’t mean accepting a cramped bathroom. Tiny home bathrooms demand smart planning, but the payoff is significant: a functional, stylish space that feels larger than its square footage. Whether you’re retrofitting an RV, renovating a studio apartment, or building a compact dwelling, the right fixtures, storage solutions, and design strategies transform even the tightest bathrooms into pleasant, efficient spaces. This guide covers the practical fixtures and layout decisions that work in real tiny home bathrooms, paired with honest advice on what requires professional help and where DIY saves money.
Key Takeaways
- Tiny home bathrooms benefit from compact fixtures like corner toilets (24–27 inches deep) and wall-mounted vanities (18–24 inches wide) that maximize floor space without sacrificing functionality.
- Vertical storage solutions—including floating shelves, over-the-toilet units, and corner shelves—are essential in tiny bathrooms, allowing you to store items efficiently without consuming limited floor space.
- Bright, cool-toned lighting (4000K–5000K) combined with light-colored walls and large mirrors creates the illusion of space and transforms how a tiny home bathroom feels.
- Pocket doors or barn-style sliding doors save 8–10 square feet compared to traditional swing-out doors, significantly improving usability in confined layouts.
- Budget-friendly upgrades like paint, mirror swaps, vanity lighting, and peel-and-stick tiles can transform a tiny bathroom in a weekend without requiring extensive plumbing or electrical work.
- Design tiny bathrooms around fixed plumbing locations using layouts like corner arrangements or single-wall configurations, and maintain at least 24 inches of clear floor space per building codes for safe navigation.
Space-Saving Fixtures and Installations
Compact Toilets, Sinks, and Vanities
The right toilet, sink, and vanity set the tone for a tiny bathroom. Standard residential toilets measure roughly 30 inches front-to-back and 14 inches side-to-side, but compact models shrink that footprint significantly. Corner toilets measure 24–27 inches in depth, leaving extra floor space. Wall-mounted toilets (which require rough-in plumbing before drywall goes up) save 8–10 inches of floor depth because there’s no tank footprint. If you’re gutting the bathroom, a wall-mounted unit is ideal: retrofit jobs often stick with a standard toilet to avoid reopening walls.
For sinks, pedestal sinks occupy roughly 20–24 inches of wall space and leave the floor visible underneath, creating an illusion of openness. But, they offer zero storage. Wall-mounted vanities (18–24 inches wide) mount at elbow height and include a small cabinet. Pair one with an open shelf or two above for towel storage. If you need countertop space and storage, a corner vanity (24–36 inches on two sides) fits snugly and provides dual-face access in tight layouts.
Consider your plumbing: moving rough-in lines costs money and requires a licensed plumber in most jurisdictions. If the toilet and sink are already in place, work around them. Wall-mounted vanities do require solid backing in the wall (blocking or studs rated for the combined weight of vanity, water, and user leaning force). Install 2×10 backing horizontally between studs before drywall.
Faucets matter too. Single-lever faucets (like a moen cartridge or ball-type) use less counter space than two-handle models and are easier to operate in tight quarters. Choose a low-arc spout (6–8 inches tall) to avoid bumping your head when washing up.
Smart Storage Solutions for Minimal Bathrooms
Storage is where tiny bathrooms sink or shine. Before adding a single shelf, audit what you actually keep in the bathroom: daily-use items (toothbrush, soap, deodorant) deserve counter or wall space: occasional items (first aid, hair tools) can go higher or deeper.
Vertical storage is non-negotiable. Floating shelves (12–18 inches deep) mounted 12–15 inches above the sink or toilet hold bottles and rolled towels without eating floor space. Use white or light-toned shelves to avoid a heavy, cramped feel. Screw directly into wall studs or use heavy-duty toggles rated for 25+ pounds per fastener if you hit drywall.
Corner shelves maximize dead space. A triangular or L-shaped corner unit in the 6×6-inch to 12×12-inch range fits above the toilet tank or beside the vanity. Stock design elements from retailers like Remodelista show how curated shelving elevates small spaces without clutter.
Medicine cabinets (16–24 inches wide, recessed into the stud cavity) provide hidden storage without protruding into the room. If the wall has plumbing, avoid recessing: surface-mount cabinets work just as well and avoid costly rerouting.
Over-the-toilet shelving units add 2–3 shelf tiers without taking floor space. Look for units that sit on top of the tank (no tools) and are rated for 25–40 pounds. Avoid plastic hinges: metal frames and proper fastening prevent wobbling.
For towel storage, use wall-mounted towel bars stacked vertically (one 24-inch bar at 48 inches high, another at 60 inches) rather than a single bulky bar. Rolled towels on shelves also save space compared to hanging.
Lighting and Color Strategies to Enhance Perception of Space
Lighting and color trick the eye into perceiving space that isn’t there. Poor lighting makes even a 50-square-foot bathroom feel like a cave: good lighting opens it up.
Bright, cool-toned light (4000K–5000K color temperature) energizes the space and reads as larger than warm light (2700K). Install a ceiling fixture rated for 70–80 foot-candles over the sink and toilet (usually 1,200–1,600 lumens for an 35-square-foot room). Add a vanity bar (18–36 inches, with side-facing bulbs) for shadow-free mirror lighting. Both should be on separate switches or a dimmer so you can dial in the intensity.
Color amplifies perceived space. White, off-white, and very pale gray walls reflect light and make the room feel open. Matte or soft-sheen finishes (eggshell) are easier to clean than flat paint and hide minor imperfections. Avoid dark tiles or wall colors in tiny bathrooms unless paired with very bright lighting.
Mirrors are magic. A large mirror (24×36 inches minimum) opposite a light source bounces illumination and depth. Frameless mirrors read cleaner than framed versions in tight spaces. If wall space is limited, a mirrored medicine cabinet serves dual duty.
Accent colors work if used sparingly. One painted wall (in a pale blue, soft green, or neutral tone) or patterned tile on a single 2×2-foot accent zone (like the wall behind the toilet) adds personality without overwhelming. Keep dominant surfaces (walls, large tiles) light and neutral.
Lighting installation is straightforward for surface-mounted fixtures (vanity bars, ceiling lights) with standard wiring. Recessed lights require roughing-in before drywall and are best hired out if you’re uncertain about electrical code (NEC Article 410). A licensed electrician ensures proper branch circuits, GFCI protection (required in all bathrooms per NEC), and fire-rated housing around recessed cans.
Layout and Design Optimization Tips
Corner Utilization and Vertical Organization
The layout of a tiny bathroom hinges on the footprint you have and where plumbing rough-ins are located. You can’t move a toilet’s soil line without extensive (and expensive) reframing, so design around what’s fixed.
The single-wall layout (all fixtures along one wall, toilet, sink, shower/tub) is common in RVs and very small apartments. It maximizes clear floor space but requires compact versions of each fixture and stacked storage above.
The corner layout positions the toilet in one corner, the sink in another, and the shower/tub on a third wall. This spreads fixtures and prevents a feeling of confinement. Corner shelves above the toilet and beside the sink use otherwise dead angles. Angled or curved shower rods in a corner tub save a few inches of swing-out space.
Pocket doors (sliding doors mounted into the wall cavity) instead of swing-out doors free up 8–10 square feet of clearance. Installation requires a rough-in frame kit before drywall: retrofit pocket doors are possible but complex. Standard hinged doors swing inward (to open into the bathroom) to keep the hallway clear, but in tight spaces, a barn-style sliding door mounted externally (outside the bathroom frame) works and avoids the bulky pocket-door infrastructure.
Ventilation placement affects layout. Exhaust fans should be ducted outside (through the roof or wall, never into an attic) to prevent moisture damage. A 6-inch diameter duct is standard for bathrooms under 100 square feet: oversized fans move air but waste energy. Mount the fan on the ceiling away from the shower zone and run insulated ductwork to minimize condensation noise.
Measure actual walk-through clearance. A tiny bathroom needs at least 24 inches of clear floor in front of the toilet and sink for basic usability (IRC 2021 guidelines for residential bathrooms). If you’re confined to 20 square feet, corners and above-fixture shelving become essential. Home decorating inspiration showcases real tiny bathrooms with working layouts, study a few to see spatial solutions before committing to a design.
Budget-Friendly Renovation Ideas for Small Bathrooms
Renovating a tiny bathroom on a budget requires prioritizing what actually gets gutted versus what gets refreshed.
Paint and fixtures are the quickest wins. Repainting walls and ceiling (bright white, eggshell finish) costs $100–300 in materials and labor if you DIY. Replacing the vanity faucet ($50–150 for a quality brass or chrome lever-handle model) and upgrading the vanity lighting ($80–200 for a 24-inch LED bar) transforms the sink zone without touching plumbing.
Peel-and-stick tiles over existing ceramic update the look for $200–400 (a 35-square-foot bathroom at roughly $6–10 per square foot). They’re not permanent, but they’re durable and adhesive formulas have improved. Avoid high-moisture zones (directly in shower spray) and test a small section for durability.
Floating vanity swaps (removing the old pedestal or cabinet and installing a 18–24-inch wall-mounted unit with plumbing adapted in-place) run $300–800 including new faucet and installation. DIYers comfortable with rough plumbing can do this: if you’re unsure, hire a plumber for the water lines and do the cabinet hanging yourself (use a level and stud-finder).
Mirror and lighting upgrades are budget-friendly and impactful. A frameless mirror (36×24 inches, $60–120) and a new vanity light bar ($80–200) improve function and perception of space dramatically. Both are straightforward installs: mirror uses adhesive tabs or simple brackets: vanity bar requires basic wiring if it’s replacing an old fixture (same circuit, standard outlet).
Grout and sealant refresh (cleaning and resealing existing tile) costs $50–150 in supplies and prevents water damage. Use a grout sealer (penetrating type, not membrane) rated for your tile type.
Set realistic timelines. A cosmetic refresh (paint, lighting, mirror, vanity faucet) takes a weekend. Fixture swaps (toilet, vanity, shelving) take 2–3 days and may require a plumber or electrician. Full renovations (new tile, moving plumbing, ventilation upgrades) take weeks and typically need licensed tradespeople for structural, plumbing, and electrical work.