

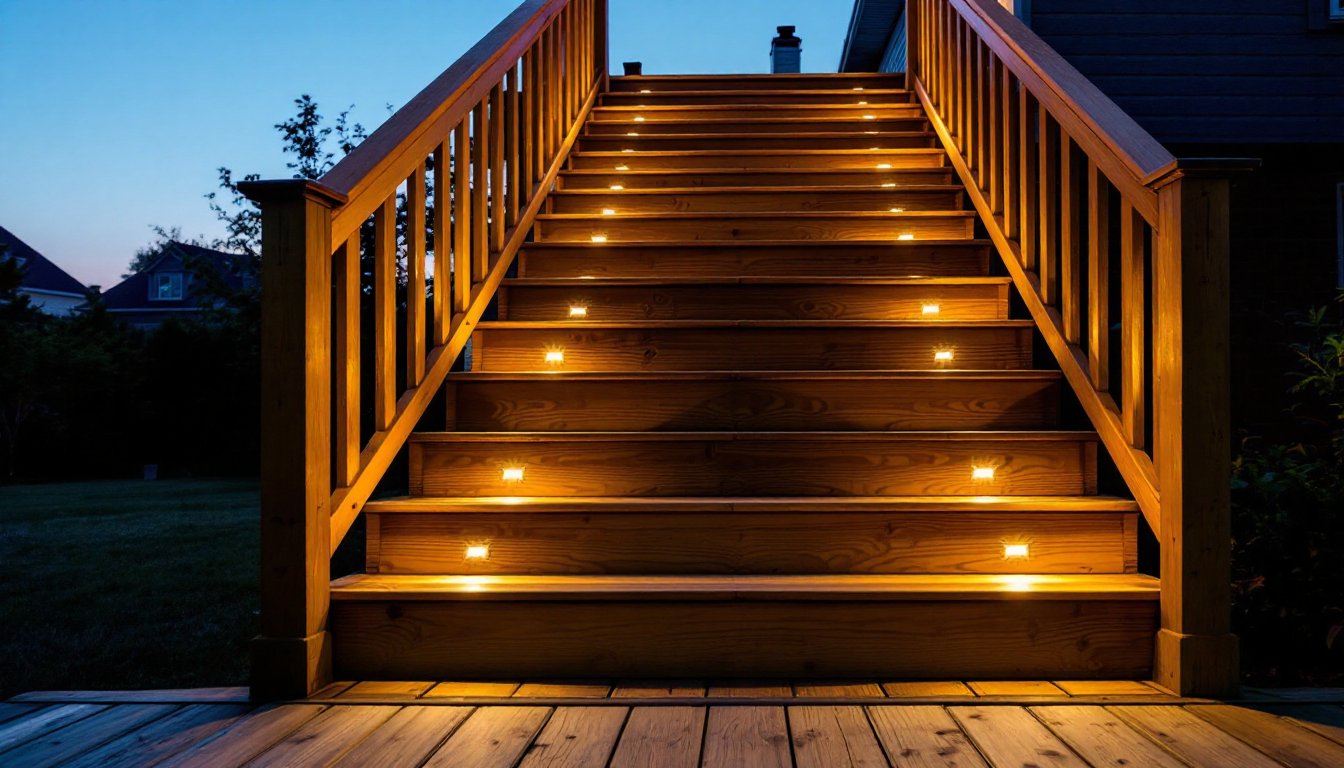

Deck stairs can be a tripping hazard once the sun goes down. Without proper lighting, even a well-built staircase becomes a liability after dark, guests stumble, kids miss steps, and you’re stuck fumbling for the outdoor light switch. Beyond safety, the right deck stairs lighting transforms an overlooked structural element into a design feature that extends your outdoor living season well into the evening. Whether you’re working with a small three-step platform or a grand multi-level descent, this guide walks you through selecting and installing lighting that keeps everyone safe while adding polish to your outdoor space.
Key Takeaways
- Deck stairs lighting is essential for safety—it eliminates tripping hazards and helps visitors navigate confidently by improving depth perception in low light conditions.
- Popular deck stairs lighting options include recessed LED step lights (most practical), post-cap fixtures (budget-friendly with solar variants), and LED strip lights (best for ambiance and layered effects).
- Choose lights in the 3000K–4000K color temperature range to balance safety visibility with warm hospitality; recessed lights should provide 100–150 lumens for adequate stair illumination.
- Careful installation planning is critical: map joist locations, avoid drilling too close to step edges (stay 1.5 inches inboard), and use outdoor-rated stainless steel fasteners to prevent corrosion.
- Hardwired deck stairs lighting provides consistent, weather-independent performance, but always verify local building codes, GFCI requirements, and permit thresholds before running new electrical circuits.
- Combining multiple lighting types—such as recessed lights for safety plus rope lighting for style—creates layered illumination that works both functionally and aesthetically.
Why Deck Stairs Lighting Matters for Safety and Style
Poorly lit deck stairs account for countless twisted ankles and minor injuries each year. The human eye struggles to judge depth and edge distance in low light, especially when transitioning from a bright interior to darkness. Building codes in many jurisdictions actually require deck railings and stairs to be illuminated if they’re part of an egress route (an emergency exit path), though requirements vary by location, check your local IRC or city building department for specifics.
Beyond code compliance, strategic lighting eliminates shadowed steps and nosing edges, letting visitors navigate confidently. The right setup also prevents that awkward moment of groping for handrails. Style-wise, subtle step lights or post-cap fixtures create visual interest and define the deck’s perimeter without feeling like stadium lighting. Warm color temperatures (2700K–3000K) feel inviting at night, while cool white (5000K+) delivers clinical visibility if that’s your goal. Most DIYers find a middle ground, 3000K to 4000K, strikes the balance between safety and ambiance.
Types of Deck Stair Lighting Options
LED Step Lights and Recessed Options
Recessed LED step lights are the most popular choice for deck stairs, and with good reason. These fixtures sit flush within or just below the step tread (the horizontal surface you walk on), casting light downward and slightly forward onto the next step. Installation typically involves drilling a hole sized for the fixture body, usually 1.5 to 2 inches in diameter, then securing the light from underneath or behind the riser (the vertical face of the step).
Recessed lights come in two main varieties: screw-in and hardwired. Screw-in recessed LED fixtures are simpler for DIY work because they use standard LED bulbs (usually 12V or low-voltage) powered by a transformer, eliminating the need to run live electrical wiring. Hardwired systems require running NM cable (Romex) or low-voltage wiring through the deck structure, which demands more planning but offers a cleaner appearance and permanent connection. If your deck stairs are already built, retrofitting recessed lights into treads is feasible but requires careful drilling and routing to avoid hitting joists or damaging structural integrity.
RGB (color-changing) LED step lights appeal to homeowners who want flexibility, though white or warm white lights remain the practical standard for safety-focused applications.
Post Caps and Surface-Mount Fixtures
Post-cap lights sit atop deck railing posts and work best when posts align with or near the stair edge. A typical post cap light costs $20–$60 and mounts to a 4×4 post top using a mounting plate and a few fasteners. Solar post caps are popular budget options, though they require full sun exposure and won’t perform well in shaded areas or northern climates where winter days are short.
Hardwired post-cap fixtures provide consistent output and are less dependent on weather, making them more reliable for stair visibility. Some designs accept standard bulbs (LED, incandescent, CFL), while others use proprietary LED modules. Installation is straightforward: cut a hole for the electrical conduit (if wired), secure the mounting flange, and connect the fixture to your deck’s electrical circuit through a weatherproof box.
Surface-mount fixtures, small rectangular or cylindrical lights attached directly to the face of a post, wall, or stair riser, are another option. These don’t require drilling into the tread and are easier to install on existing decks. They cast light outward and downward, illuminating steps and adjacent areas. For stair safety specifically, surface-mount lights on risers work well when positioned every other step or at the top and bottom of a flight.
Rope and Strip Lighting Alternatives
Rope lights and LED strip lights offer a softer, more contemporary look. These flexible, adhesive-backed strips can be applied along the underside of step nosings or mounted on post edges, creating a glowing perimeter effect. Common options include 12V RGB strips controlled by remote or app, or simple warm-white strips that need no controller.
Rope and strip lights require a low-voltage power supply (transformer), which must be plugged into an outdoor-rated GFCI outlet (a ground-fault circuit interrupter outlet, mandatory for safety). The main drawback: they’re less focused than step lights, so visibility on the tread itself isn’t quite as direct. But, they’re excellent for ambiance and supplementing recessed or post-cap lights. Installation is quick, clean the mounting surface (step nosing or post face), peel the adhesive backing, and press the strip in place. For durability, silicone-sealed rope lights resist moisture better than standard units.
Many DIYers combine strip lighting (for style) with recessed or post-cap fixtures (for practical stair visibility), creating layered lighting that works both functionally and aesthetically.
Installation Tips for DIY Deck Stairs Lighting
Prep work is everything. Before drilling, cutting, or routing, measure twice and mark your layout clearly. If you’re installing recessed lights, test-fit the fixture body in scrap wood first to ensure your drill bit and hole saw match the product specs exactly. Misaligned holes lead to wasted time, damaged treads, or fixtures that don’t sit flush.
For recessed lights in existing decks, plan your layout around existing joist locations. Use a stud finder or joist scanner to map the deck frame underneath. Most steps are 7–8 inches deep and 10–11 inches wide (tread depth and width vary, so measure yours). A single light per step works for standard stairs: wider steps might need two. Avoid drilling too close to the tread edge, stay at least 1.5 inches inboard to maintain structural integrity and prevent water infiltration around the hole.
If running electrical for hardwired lights, respect code requirements in your area. In most jurisdictions, outdoor circuits need GFCI protection, #12 AWG wire minimum, and conduit in exposed runs. Burying low-voltage wiring under deck boards doesn’t require conduit in all areas, but check your local code first. Never assume, contact your building department or hire a licensed electrician for questions about circuit capacity, breaker requirements, or permit thresholds. Some jurisdictions require a permit if you’re adding new circuits or outlets: others don’t. Frame it right and avoid costly corrections later.
For surface-mount and post-cap lights, secure mounting is critical. Use fasteners rated for outdoor use (stainless steel or galvanized, never plain steel). Corrosion compromises the connection and can lead to loose fixtures or water damage. Silicone-seal any gaps around the mounting base to keep water out. Check step-by-step DIY guides for detailed tutorials on wiring post-cap lights or installing low-voltage systems.
When installing strip or rope lighting, ensure the surface is clean and dry before applying adhesive. Dust or moisture reduces adhesion, and the strip will sag or peel after a few weeks. For high-traffic areas, reinforce adhesive-backed strips with silicone caulk or small fasteners (if approved for the product). Orient rope lights so the glow aims downward or outward, avoid directing light upward into your eyes or your neighbors’ windows.
Safety reminder: Wear safety glasses when drilling (wood chips and dust are hazards), and use gloves when handling rough cut edges. For electrical work, kill the circuit at the breaker before touching any wires. Low-voltage systems (12V) are safer than standard 120V circuits, but always verify polarity and wiring with a non-contact voltage tester.
Choosing the Right Brightness and Color Temperature
Brightness is measured in lumens, not watts. A standard recessed LED step light outputs 50–150 lumens, which is adequate for accent and accent-plus safety lighting. If steps are the primary path to your yard or driveway after dark, aim for lights in the 100–150 lumen range or use multiple fixtures. Post-cap lights typically range 100–300 lumens depending on the bulb and design.
Color temperature is measured in Kelvin (K). Warm white (2700K–3000K) feels inviting and creates a relaxed ambiance: it’s popular for entertaining spaces. Neutral or cool white (4000K–5000K) boosts visibility and works well when stair safety is the priority. For deck stairs specifically, a 3000K–4000K middle ground delivers both safety and hospitality, bright enough to see edges and steps clearly, warm enough to feel like you’ve intentionally lit the space rather than turned on a parking lot.
Test before committing. If you already have deck lighting or outdoor fixtures, walk the stairs at dusk and note what feels comfortable. Some homeowners prefer cooler light: others find it harsh and cold. Dimmable LED fixtures (available for recessed, post-cap, and strip lights) let you adjust brightness after installation. This is a smart hedge if you’re unsure, install once, fine-tune your preference later.
Combination setups work well: use warm-white recessed lights for practical safety and cool-white rope lighting for contemporary flair, or vice versa. Modern LED technology means color consistency across fixtures is better than it was even a few years ago, so mixing fixture types feels cohesive. Research modern deck building techniques and lighting design principles to see how professionals balance safety and aesthetic appeal. Popular online project repositories also showcase finished deck lighting projects with photos and materials lists you can adapt to your own stairs.