

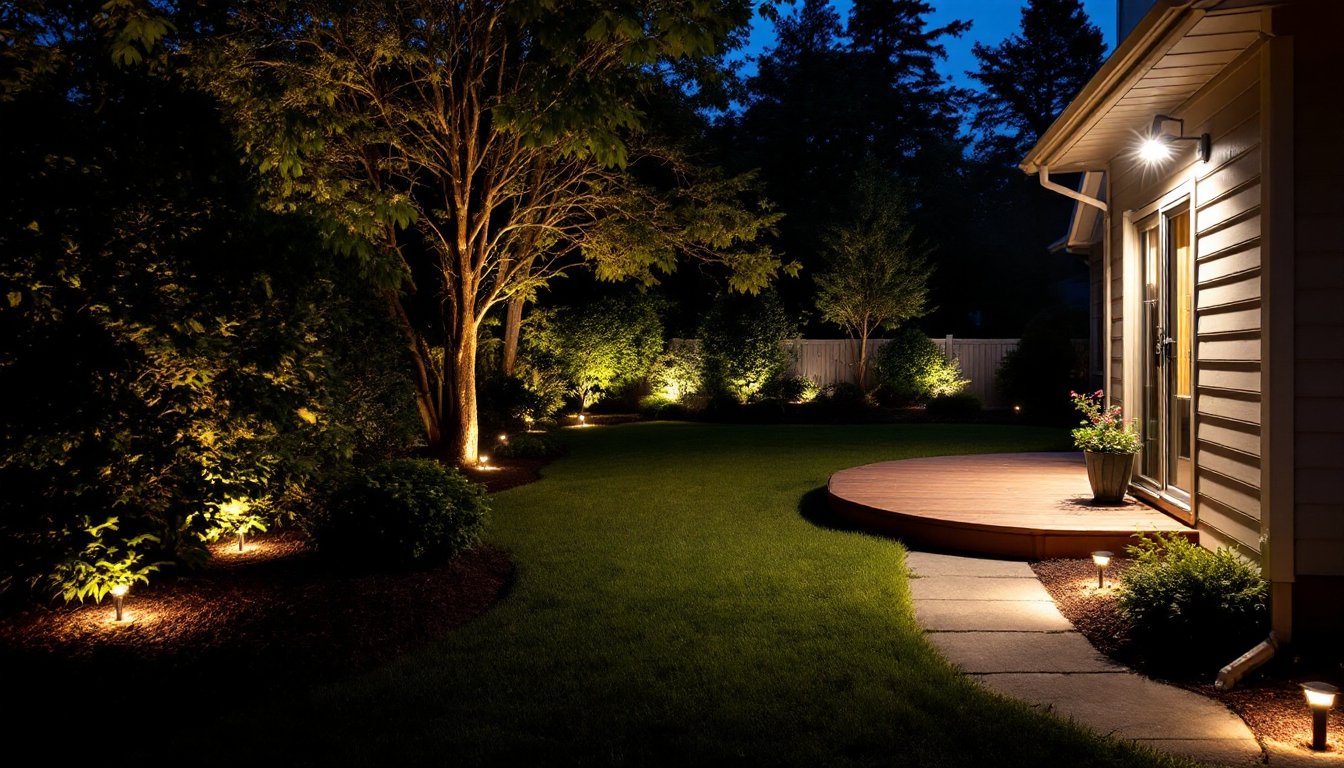

Wired outdoor lighting transforms a yard from a dark, unusable space into an inviting outdoor room that works 24/7. Unlike solar or battery-powered fixtures that fade as seasons change, wired systems deliver consistent, bright illumination year-round. They’re ideal for homeowners who want permanent pathway lighting, deck accents, security floodlights, or architectural uplighting that won’t dim by 9 p.m. The upfront labor and trenching work intimidates many DIYers, but the payoff, reliability, brightness, and longevity, makes wired outdoor lighting worth the effort. This guide walks you through choosing the right fixtures, planning a smart layout, and tackling installation safely.
Key Takeaways
- Wired outdoor lighting delivers consistent, bright illumination year-round without the performance fade of solar or battery-powered alternatives.
- Low-voltage systems (12V–24V) offer the easiest DIY installation with a transformer plugged into an outdoor outlet, while line-voltage systems (120V–240V) provide brighter coverage across longer distances.
- Plan your lighting layout using a three-layer approach: ambient lighting for general visibility, task lighting for specific areas, and accent lighting for features, aiming for a 3:2:1 ratio.
- All outdoor electrical work requires GFCI-protected outlets, proper conduit burial at code depth (typically 18 inches), weatherproof junction boxes, and local permit verification before installation.
- Wired outdoor lighting systems last 15–20 years with minimal maintenance, requiring only annual inspections for corrosion, debris clearance, and connection checks to ensure reliable performance.
Why Choose Wired Outdoor Lighting Over Solar and Battery Options
Wired outdoor lighting wins on brightness and consistency. A solar pathway light might output 30–50 lumens on a clear summer day, but drops to nearly nothing in winter or clouds. A wired low-voltage fixture delivers 200–500 lumens day in, day out, without fading as batteries age. Wired systems also eliminate the “dead battery on the coldest night” problem that plagues wireless options.
The real advantage is control. Homeowners can install dimmers, timers, motion sensors, and smart home integration, features impossible with a standalone solar light. If the power goes down, you troubleshoot one connection point, not a dozen separate dead batteries. Wired systems cost more upfront (installation labor, trenching, electrical work) but deliver 15–20 years of reliable use without replacing bulbs, solar panels, or battery packs every 2–3 years.
For security lighting, wired wins decisively. A motion-activated floodlight tied to your home’s electrical panel triggers instantly and stays as bright as daylight. Solar motion lights often miss motion or activate weakly because the battery is half-dead. If you’re serious about making your yard functional after sunset, wired outdoor lighting is the only choice that guarantees performance.
Types of Wired Outdoor Lighting Fixtures for Every Space
Low-voltage systems (12V or 24V) are the easiest DIY option. They run through a transformer plugged into a standard outdoor outlet, eliminating the need for trenching to the main panel. Fixtures are smaller, cooler to the touch, and safer around kids and pets. Low-voltage works great for pathway uplighting, deck rails, and accent lighting on trees or shrubs. The downside: you’re limited to about 100–150 feet of total cable run before voltage drop dims lights at the far end.
Line-voltage systems (120V or 240V) run directly from your home’s electrical panel through buried conduit. They deliver full brightness across longer distances and power larger floodlights, spotlights, and landscape floods. Installation requires trenching, digging a trench to code depth (typically 18 inches for residential), running conduit, and potentially pulling permits. This is the route for security lighting, driveway illumination, or lighting a large yard.
Fixtures themselves come in several flavors. Uplights and spotlights throw light upward or at an angle, perfect for highlighting trees or architectural details. Downlights mount under eaves or in overhead structures, casting light downward on patios or deck areas. Floodlights deliver wide, bright coverage for security or general yard lighting. Wall-mounted sconces provide ambient light near entryways or patios.
Pathway and Accent Lighting
Pathway lights are the workhorse of outdoor systems. Low-voltage pathway lights sit 12–18 inches tall and cast a soft glow along walkways, garden beds, or driveways. Spacing them 3–4 feet apart creates continuous light without dark gaps. For accent lighting, uplights buried at the base of trees or shrubs create dramatic silhouettes at night. A single uplight on a specimen tree, coupled with pathway lights leading to it, creates professional-looking landscape depth without overcomplicating the layout.
Planning Your Outdoor Lighting Layout and Design
Start with a site plan. On paper, sketch your yard, mark structures (house, deck, shed, trees), and identify what you actually use after dark. Do you walk to a side gate? Does a patio become a gathering spot? Are there dark corners creating security concerns? Mark those zones first, those are your anchor points for lighting.
Roughly divide your landscape into layers. Ambient lighting provides general visibility (overhead lights, floodlights on eaves). Task lighting illuminates specific areas (deck rails, patio, stairways). Accent lighting highlights features (trees, water features, architectural details). A balanced yard uses all three. Too much ambient light looks like a parking lot: too much accent feels theatrical. Aim for a 3:2:1 ratio of ambient to task to accent.
Measure distances carefully. Use a 100-foot tape or smartphone measuring apps to map from your planned fixture locations back to your power source (outdoor outlet or main panel). For low-voltage systems, note if the total cable run exceeds 100 feet: if so, you’ll need a second transformer or larger gauge wire. For line-voltage work, measure trench length and width (code typically requires 18-inch depth and 12-inch width for residential conduit).
Hold off on fixture selection until the layout is locked. Once you know where lights go and how much brightness you need, choosing the right wattage and beam angle becomes straightforward. A professional lighting designer can sketch a formal plan, but most DIY yards benefit from a simple hand-drawn sketch and site measurements.
Basic Installation Steps for DIY Homeowners
Low-voltage installation is the most beginner-friendly. Plug the transformer into a GFCI-protected outdoor outlet (existing outlet or new one installed by an electrician). Run the low-voltage cable from the transformer through the yard to each fixture location. Cable can sit on top of soil or be buried a few inches under mulch: it’s safe at low voltage. Attach each fixture’s connector to the main cable using supplied splice connectors, most use a simple push-together design with no tools needed.
Before you begin, mark all fixture locations with spray paint or flags. Sketch the cable route to avoid future trenching or landscaping accidents. Unroll cable gradually, testing as you go. If lights dim near the far end, switch to heavier-gauge wire (10-gauge instead of 12-gauge) for longer runs.
Line-voltage installation requires more planning and typically a permit. You’ll need to dig a trench (or hire a trenching service for $500–$1,500, depending on distance and soil type) from your electrical panel to each fixture location. Run conduit (a protective PVC or metal tube) through the trench, then pull electrical wire (THWN or UF cable, depending on local code) through the conduit. Bury the conduit 18 inches deep or per local code.
Every fixture connection requires a weatherproof junction box. Splice wires using wire nuts rated for outdoor use, and coat the connection with silicone sealant. If you’re not comfortable working with 120V or 240V circuits, hire a licensed electrician for the panel connections and main cable run: you can do trenching and fixture prep yourself. The step-by-step instructions for installing low-voltage wired landscape lighting walk through both systems in detail.
Electrical Safety and Code Compliance
This is non-negotiable. Outdoor electrical work involves moisture, buried cables, and high voltage in some cases. Always wear eye protection and gloves when digging: watch for underground utilities (call 811 before digging in most U.S. states). If your trench hits a buried gas, water, or electric line, stop immediately and contact the utility.
All outdoor outlets must be GFCI-protected (ground fault circuit interrupter). A GFCI outlet detects ground faults and cuts power in milliseconds, preventing electrocution. Most building codes require this for anything within 6 feet of water or grade level. If you’re unsure whether your outdoor outlet is GFCI-protected, hire an electrician to install one.
Permits vary wildly by jurisdiction. Low-voltage work often doesn’t require a permit, but line-voltage installations almost always do. Check with your local building department before digging. An inspector will verify proper conduit depth, wire gauge, junction box placement, and GFCI protection. It’s a hassle, but inspections catch problems that could burn your house down or electrocute someone in five years.
Use outdoor-rated wire and connectors only. Indoor wire insulation fails in UV and moisture. Splices must be housed in weatherproof junction boxes sealed with silicone. Avoid junction boxes in low spots where water pools: bury them slightly above grade or in an elevated location. How to put in low-voltage landscape lighting covers these safety steps in practical detail.
Maintenance and Seasonal Care Tips
Wired systems are low-maintenance, but a few annual checks keep them running smoothly. In spring, inspect all junction boxes and connections for corrosion or pest damage. If you see white or blue oxidation on brass terminals, scrub it with a soft brush and a little vinegar, then apply a light coat of dielectric grease (like petroleum jelly, but designed for electrical connections). This prevents moisture intrusion.
Clear debris from under fixtures and around junction boxes. Leaves, dirt, and organic matter trap moisture and accelerate corrosion. In fall, trim back shrubs and trees so wires aren’t pinched or chafed by growth. Rodents love to nest near outdoor lighting: if you see gnawed insulation, wrap the damaged section with electrical tape and monitor it. If damage is severe, call an electrician to replace the wire.
Bulbs themselves rarely fail if the system is properly grounded and GFCI-protected. LED bulbs last 25,000–50,000 hours (10–20 years at typical nightly use), so you’re unlikely to replace them. If a light stops working, check the connection first, a corroded splice or loose connector is 90% of outdoor lighting failures. Tighten or clean the connection before assuming the bulb is dead.
In harsh climates, consider weatherproof covers for unused junction boxes and outlets during off-season months. Heavy snow and ice can stress conduit: ensure it’s firmly anchored and inspect for cracks after winter. If your yard floods, elevate junction boxes above the flood line. Smart timers and smart home technology integration let you automate seasonal schedules, shorter runtimes in winter, full schedules in summer, which stretches bulb life and cuts electricity use. A little annual care keeps a wired system humming for decades.
Conclusion
Wired outdoor lighting is an investment that pays back in reliability, brightness, and years of trouble-free operation. Start with a clear site plan, choose between low-voltage (easier DIY) and line-voltage (longer reach) based on your yard’s size and your comfort with electrical work, and don’t skip safety checks or permit requirements. Once installed and sealed properly, you’ll have a functional, beautiful yard that’s as usable at 9 p.m. as it is at 9 a.m.