

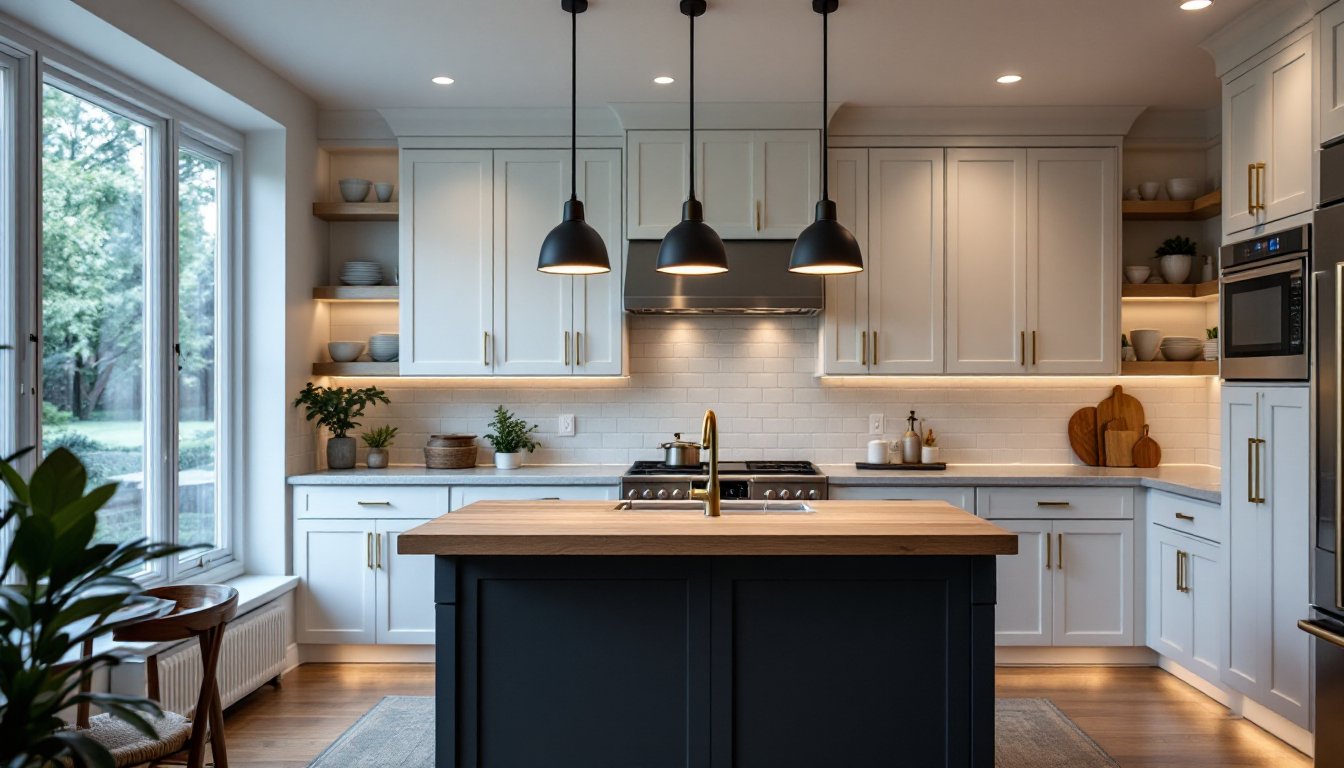

Good kitchen lighting isn’t just about seeing what you’re chopping, it’s the difference between a dark, cramped workspace and a welcoming room where people actually want to hang out. Most kitchens rely on a single overhead fixture, which is a missed opportunity. The best kitchen lighting fixtures work together in layers: some illuminate the countertops while you cook, others set the mood, and a few make the space feel intentional and finished. This guide walks through the fixture types that work, where to place them, and how to choose what fits your layout and style without overthinking it.
Key Takeaways
- Best kitchen lighting fixtures work in three layered categories—ambient, task, and accent lighting—each serving a specific purpose rather than relying on one overhead fixture.
- Pendant lights over islands should hang 12–18 inches above the counter with two to three fixtures spaced 30 inches apart, while under-cabinet LED strips provide affordable and practical task lighting for countertops.
- Kitchen lighting layout depends on your space: islands need positioned pendants, perimeter counters require under-cabinet strips or recessed lights above cabinets, and larger kitchens need multiple ceiling fixtures spaced 6–8 feet apart.
- Choose warm white bulbs (2700K) for ambient and accent lighting to create coziness, neutral white (3000K–4100K) for task lighting and cooking areas, and avoid cool white (5000K+) to prevent a sterile feel.
- Match two to three fixture finishes across your kitchen—such as brass with matte black—rather than mixing five different finishes, as matte and brushed metals hide dust and fingerprints better than chrome or shiny options.
Understanding Kitchen Lighting Layers
Ambient, Task, and Accent Lighting Explained
Professional kitchen designers talk about layered lighting, a concept worth stealing for your own project. It means installing fixtures that each do a specific job rather than expecting one light to handle everything.
Ambient lighting is your baseline illumination. It fills the room evenly, so you’re not squinting in dark corners. Recessed ceiling lights or a large chandelier typically handle this. A good rule: aim for 20–30 foot-candles of light across your kitchen work areas, bright enough to see clearly without glare.
Task lighting points directly at countertops, islands, and the sink where you actually do the work. This is where pendant lights and under-cabinet fixtures shine (literally). You need concentrated light without harsh shadows, especially near your cutting board and cooktop. Task lights should run parallel to the counter edge to minimize your own shadow.
Accent lighting adds dimension and warmth, maybe lighting the inside of open shelving, highlighting a backsplash, or warming up an eating nook. It’s the most forgiving layer and often the last one homeowners add. Accent lights make a kitchen feel intentional and layered rather than purely functional.
Skip any of these three, and the room feels off. You might have bright task lighting but a dark corner that makes the space feel cramped, or ambient light without task lighting that forces you to squint at your cutting board. Plan all three from the start.
Top Kitchen Lighting Fixture Types
Pendant Lights, Chandeliers, and Recessed Options
Pendant lights hang from a rod or chain and work best over islands, eating counters, or in clusters above a sink. They’re popular because they’re stylish, adjustable in height, and come in almost any finish. The catch: a single pendant over a 4-foot island doesn’t cut it, install two or three spaced evenly about 30 inches apart. Pendant height matters too: they should hang 12–18 inches above the counter, with at least 4–5 feet of headroom so you don’t bonk your head. Budget roughly $40–$300 per fixture depending on material and brand, plus installation if you’re running new wiring.
Chandeliers work in larger kitchens or open-concept spaces where they anchor a dining area. In 20 Kitchen Lighting Ideas, designers often showcase smaller, modern chandeliers rather than ornate statement pieces. Key point: a chandelier should hang 30–36 inches above a dining table, but in a working kitchen with an open concept, hang it where it won’t obstruct sightlines or create a glare hazard. Cost ranges from $100–$800+, depending on materials.
Recessed lights (also called can lights or pot lights) sit flush in your ceiling and are the workhorse of ambient lighting. They’re low-profile, clean, and scalable, you can install six or eight across a large kitchen. Downside: they’re not great for task lighting alone, and retrofit installation in existing ceilings means cutting holes, running wiring, and getting an electrician involved (costs $75–$150 per fixture installed). If you’re planning a remodel with new drywall, recessed lights are easier to plan in during framing.
Under-cabinet lighting sits on the underside of upper cabinets and points down at countertops. This is pure task lighting and arguably the most practical upgrade a working cook can make. LED strip lights cost $20–$60 per run, plug in easily, and eliminate shadows directly where you need them gone. The Kitchn frequently recommends under-cabinet LEDs as a quick, affordable improvement.
Track lighting mounts to the ceiling and directs light where you aim it. It’s flexible and works in oddly shaped kitchens, but it can feel industrial or dated if not chosen carefully. Use it when recessed lights aren’t feasible or when you want adjustable task light over a peninsula.
Most kitchens benefit from a mix. Recessed or ambient fixtures provide base light, pendants or under-cabinet strips handle tasks, and perhaps a small chandelier or accent strip finishes it out.
Choosing the Right Fixtures for Your Layout
Island, Counter, and Ceiling Solutions
Your kitchen’s layout dictates where fixtures go. A galley kitchen with no island looks totally different from an open-concept space with a 10-foot island.
Island lighting is the most visible fixture in most modern kitchens. Hang two or three pendants 12–18 inches above the countertop, centered and evenly spaced. If your island is long (6 feet+), go with three pendants roughly 3 feet apart. If it’s shorter, two work fine. The fixture width should be 1/3 to 1/2 the island width, an enormous chandelier over a small island looks ridiculous. Don’t skimp on electrical planning here: if the island doesn’t already have a circuit run overhead, hire an electrician to install one before you buy fixtures.
Perimeter counter lighting often gets ignored, but it’s critical. Upper cabinets block light, creating a shadow zone. Under-cabinet strip lights solve this cleanly and affordably. If you prefer a cleaner look without strips showing, install recessed lights above the cabinets, angled down onto the counter, or integrate lighting into the cabinet undersides themselves during a remodel. Most kitchens need 20–30 linear feet of under-cabinet illumination.
Ceiling fixtures anchor the room. In a smaller kitchen (under 120 square feet), one recessed fixture cluster or a small flush-mount chandelier is enough. Larger kitchens need multiple ceiling fixtures spaced 6–8 feet apart. Use a rough formula: multiply the room’s length and width in feet, then install one fixture per 50–75 square feet of space. A 150-square-foot kitchen needs roughly 2–3 ceiling fixtures.
Code note: Kitchens need a minimum of 1 switch-controlled ceiling fixture. If you install multiple recessed lights, put them all on one switch or dimmer so they work as one ambient layer. Track and pendant lights can be on separate switches for more control, but don’t overcomplicate it, you want flexibility without standing at ten different switches.
In 10 Easy Pieces: Pendant Lights for Kitchens, designers emphasize that fixture placement should reflect how you actually use the space. If you’re left-handed and chop on the left side of your island, task light should aim there, not in the middle.
Style and Design Considerations
Kitchen lighting fixtures come in dozens of styles, but they fall into a few categories: modern/minimalist, farmhouse, industrial, vintage, and transitional (a blend of styles that works almost anywhere).
Modern fixtures tend toward clean lines, matte or polished metals, and geometric shapes. They’re forgiving in any kitchen and age well. Brass and matte black finishes are durable and hide fingerprints better than chrome.
Farmhouse fixtures often feature glass shades, wrought iron, or wood elements. They pair well with open shelving and butcher-block counters. Avoid overly trendy farmhouse pieces that might feel dated in five years: stick to simple shapes that just happen to have rustic materials.
Industrial fixtures use exposed filament bulbs, metal cages, or concrete. They work best in larger kitchens where they don’t overwhelm the space. Small kitchens can feel cramped with bold industrial lighting.
Material durability matters more in a kitchen than elsewhere. Brass and stainless steel hold up well: painted finishes can chip near the stove. If you cook a lot and generate heat and moisture, avoid delicate fabric shades or anything that collects dust easily. Glass and metal clean quickly and last longer.
Bulb choice affects the whole vibe. Warm white (2700K) creates coziness and hides imperfections: use this for ambient and accent lighting. Neutral white (3000K–4100K) is clear and bright without being harsh: ideal for task lighting and cooking. Cool white (5000K+) can feel sterile in a kitchen, skip it. Most LED bulbs now offer dimmability, which costs a bit more but lets you adjust brightness for different times of day and moods. Non-dimmable LEDs cost less but are less flexible.
Match fixture finishes across your kitchen. Two or three finishes (say, brass and matte black with glass) work well together: five different finishes look chaotic. If you’re unsure, go with matte black or brushed brass, both pair with almost anything and hide dust and fingerprints better than chrome or shiny finishes.