

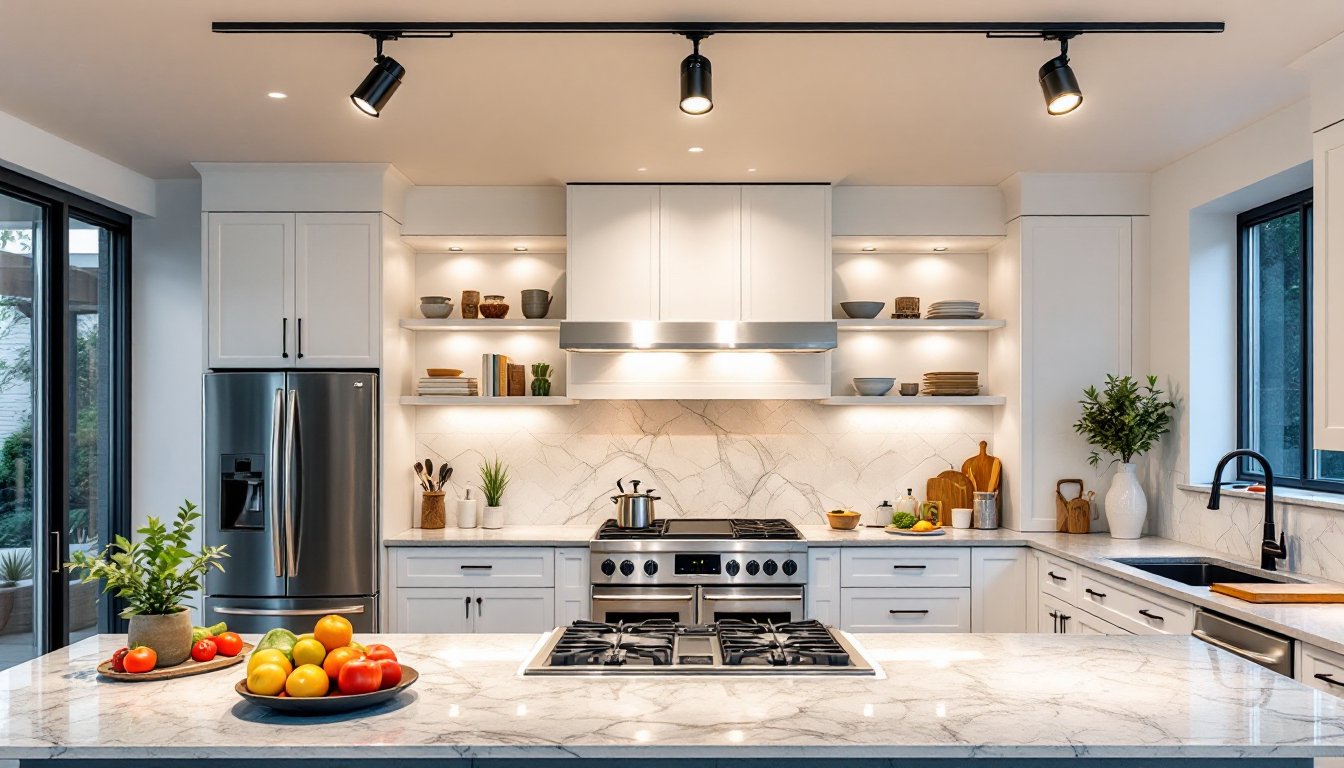

Most kitchens suffer from the same lighting problem: one or two ceiling fixtures casting shadows exactly where you need light most. Track lighting in kitchen spaces solves this by letting you aim beams wherever cooking, prep work, or dining happens. Unlike fixed overhead lights, track systems pivot, swivel, and position flexibly, turning a dimly lit workspace into a professional-grade cooking zone. Whether you’re remodeling or upgrading fixtures on an existing ceiling, track lighting offers practical illumination plus a clean, modern look. This guide walks you through selection, placement, and installation so you can brighten your kitchen the right way.
Key Takeaways
- Track lighting in kitchen spaces solves uneven shadow problems by allowing you to aim beams precisely where cooking, prep work, and dining happen, eliminating the limitations of fixed ceiling fixtures.
- The three main track system types—standard, monorail, and linear—offer different aesthetics and functionality; standard track is most affordable and widely compatible, while monorail and linear provide sleeker modern designs for smaller kitchens.
- Proper placement is critical: position track 18–24 inches from walls, 3–4 feet apart over islands, and perpendicular to sinks at a 45-degree angle to prevent shadows and deliver 300–500 lux of light over work surfaces.
- Choose LED fixtures with 3000K–4000K color temperature for flattering kitchen lighting; quality brass, aluminum, or stainless steel heads resist humidity and heat while lasting 25,000+ hours at 80% lower energy costs than incandescent.
- DIY installation is achievable by anchoring tracks to ceiling joists with toggle bolts, connecting to existing fixture outlets with color-matched wires, and testing power before snapping on fixtures—hire an electrician for $150–300 if you’re unsure about wiring.
Why Track Lighting Is Perfect For Kitchen Spaces
Track lighting excels in kitchens because it delivers focused light exactly where you work. Unlike pendant lights or ceiling fixtures, tracks let you adjust beam angles after installation, a huge advantage when your workflow changes or you add an island. Kitchens demand both task lighting and ambient light, and a single track system handles both. One fixture might brighten your cooktop: another lights the sink: a third washes the breakfast bar. You’re not stuck with whatever the builder chose.
The flexibility extends to aesthetics too. Modern track heads come in minimalist designs, vintage-inspired looks, and industrial styles, letting you match your kitchen’s vibe without replacing the whole system. Functionally, track lights direct illumination downward, reducing glare on countertops and appliances compared to recessed cans alone. They’re also easier to upgrade than rewiring for new recessed lights: you keep the track and swap out heads as styles evolve or technology improves (LED options, smart controls, color temperature adjustments). For kitchens where natural light is limited or evening cooking is the norm, track systems are worth the investment.
Types Of Track Lighting Systems To Consider
Track systems come in three main styles: standard track (two-wire or three-wire), monorail, and linear. Standard track is the most common and affordable. It runs along the ceiling with a simple two-rail or three-rail conductor, and fixtures snap into the track at any point. Three-wire versions offer flexibility to run separate circuits, so you can dim some heads independently. Two-wire systems are simpler but all fixtures share one switch.
Monorail And Linear Track Options
Monorail systems are a single rod carrying a single conductor, offering a sleeker look than bulky two-rail tracks. They’re ideal for small kitchens or modern designs where minimalism matters. Linear tracks are thin, continuous bars, sometimes nearly invisible, that run in straight lines or custom shapes. Linear is pricier but delivers the cleanest aesthetic: fixtures seem to float along an invisible wire.
For kitchens, consider your ceiling layout. If you have a vaulted or sloped ceiling, monorail adapts better than rigid standard track. If your kitchen has an island or peninsula, linear track can bend slightly to follow the edge, providing focused light where it’s most useful. Standard track works in almost any space and offers the widest fixture selection and lowest cost. Measure your ceiling’s load-bearing capacity (joists run 16 inches on-center in most homes) and verify the track weight your ceiling can support. Most residential tracks weigh 1–2 pounds per foot, well within typical ceiling limits, but confirm before installation. Your local building code may require a permit for any electrical work: check before you start.
Key Placement Strategies For Maximum Illumination
Track placement determines whether your kitchen glows or feels awkwardly lit. Start by identifying work zones: cooking surface, prep counter, sink, and seating areas. A typical kitchen benefits from one or two parallel track runs, each 18–24 inches from walls or edges.
For islands or peninsulas, run a track along the long axis, positioning fixtures 3–4 feet apart: this ensures even coverage without hot spots or shadows. Over cooktops, place the track 2–3 feet forward of the stove to avoid back-lit steam and heat damage to fixtures. Sink areas need direct overhead light: position a track perpendicular to the counter edge, aiming fixtures down at a 45-degree angle. This prevents shadows cast by your body while washing dishes.
Ceiling height matters. In standard 8-foot ceilings, position tracks 12–18 inches in from walls to avoid glare in eyes. Vaulted or 10-foot ceilings offer more flexibility: you can run track higher without creating unflattering shadows. Aim for roughly 300–500 lux (foot-candles) of light over work surfaces: this matches typical kitchen lighting codes. If you’re uncertain about placement, sketch your kitchen layout on graph paper, mark work zones, and sketch track lines with a pencil before drilling holes. A comprehensive guide to track lighting explains lux calculations and can help you determine exact fixture spacing for your footprint.
Choosing The Right Fixtures And Bulbs
Fixture heads make or break your track system. Look for adjustable models with tilt, pan, and rotation, these let you fine-tune beam direction after installation. Gimbal heads (recessed rings that hold the bulb at an angle) work well for accent lighting: cylinder or spotlight heads suit task lighting over counters and islands.
Wattage depends on your bulb choice. Halogen and incandescent fixtures often use 50W–75W heads: LED equivalents run 6W–12W with the same brightness. LEDs are almost always the smart choice: they run cooler, last 25,000+ hours, and cut energy costs by 80%. A 12W LED PAR30 bulb replaces a 75W incandescent but fits any standard E26 socket. Color temperature matters in kitchens. Aim for 3000K–4000K (warm to neutral white): this is flattering on skin tones and makes food look appetizing. 5000K (daylight) can feel harsh for evening cooking but works if you prefer clinical brightness.
Fixture materials should withstand kitchen humidity and heat. Brass, brushed aluminum, or stainless steel finishes resist corrosion better than bare metal. Avoid cheap plastic knobs and joints: they’ll crack when you adjust heads repeatedly. Budget $20–50 per fixture for quality LED-compatible heads: avoid bulk bargains that feel flimsy. For an island where fixtures are eye-level, choose designs that don’t look dingy close-up, style matters here. Kitchen design resources like The Kitchn showcase fixture styles that pair with modern and traditional aesthetics.
Installation Tips For Homeowners And DIYers
Installation requires basic tools: a stud finder, drywall anchors or toggle bolts, screwdriver, wire stripper, and voltage tester. Turn off power at the breaker before touching any wiring. Most track systems connect to existing ceiling boxes (where old fixtures sat), so you’re not running new circuits, a huge advantage for DIYers.
Start by locating studs or joists above the track line using a stud finder. Joists provide the strongest anchor points: if your track doesn’t align with joists, use heavy-duty toggle bolts rated for drywall (typically 20–50 pounds each). Drill pilot holes, insert bolts, and tighten before mounting the track bracket. Use a level to ensure the track is dead-level: any sag causes fixtures to slide or look crooked.
Wiring is straightforward if you’re tapping into an existing ceiling fixture outlet. The track connector has live (black), neutral (white), and ground (green/bare) wires. Match colors to the ceiling box wires inside a wire nut, twist them together, push the nut on, and wrap with electrical tape for safety. Use a voltage tester to confirm power is off before handling anything. If you’re uncomfortable with electrical work, hire a licensed electrician for the final connection: it costs $150–300 and ensures code compliance. Snap fixtures onto the track (they usually require a slight twisting motion to lock), adjust angles, install bulbs, and test. A step-by-step guide on track lighting installation from Family Handyman covers common mistakes like undersizing wire or forgetting circuit breaker limits. Most track systems draw 10–15 amps at full load: verify your breaker can handle it. Wear safety glasses while drilling overhead: wear gloves to prevent nicks while handling wire. If the existing ceiling box isn’t in the right spot, don’t extend wires across the attic without running them through conduit, that’s where a pro saves you from future code violations and fire hazards.
Conclusion
Track lighting transforms a dark, shadowy kitchen into a bright, task-friendly workspace with minimal headache and cost. Smart placement, quality fixtures, and careful installation mean years of reliable light and the flexibility to adjust anytime your needs change. Start with one parallel track over your main work zone, dial in the positioning, and expand later if you want more coverage. Your kitchen will feel brighter, safer, and more enjoyable to cook in.