

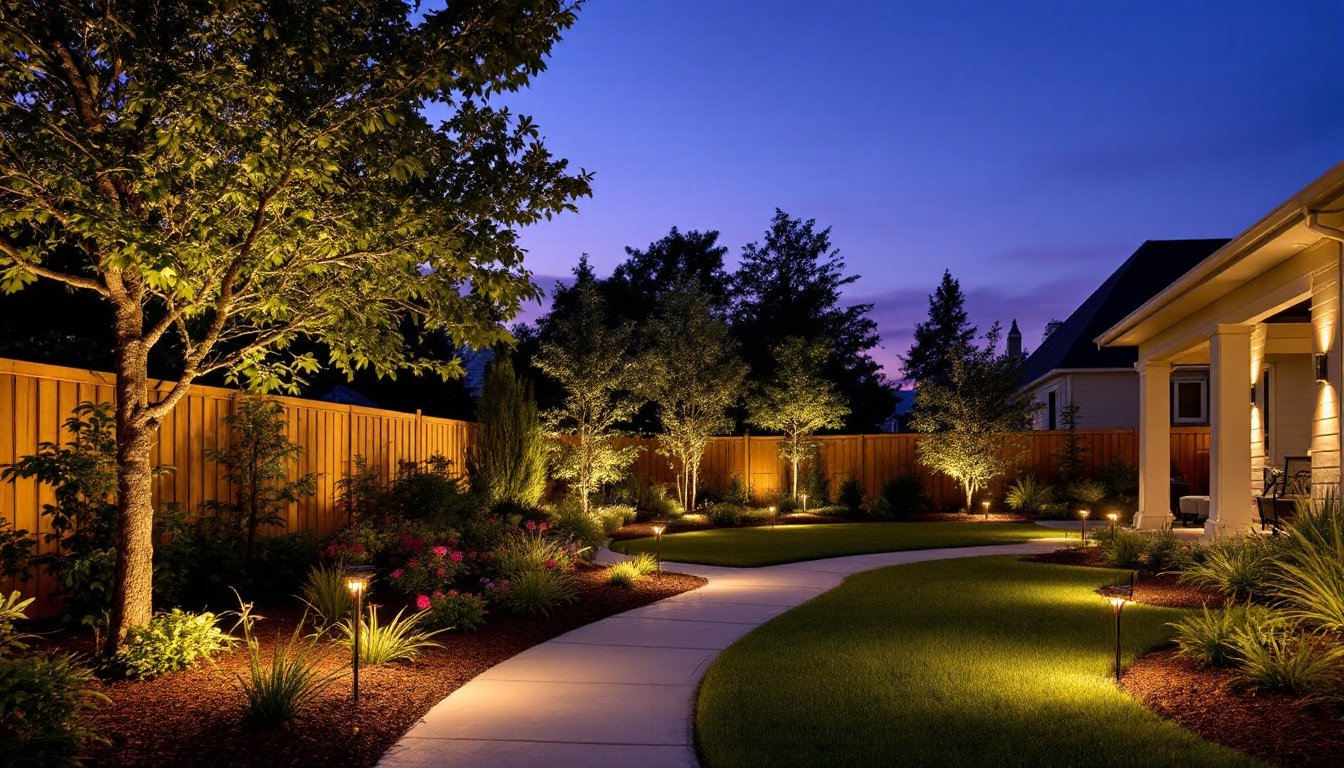

Outdoor lighting transforms a backyard from forgotten after dark to an inviting extension of your home. Whether you’re hosting a summer gathering, creating a safe walkway, or highlighting a newly planted bed, landscape lighting from Home Depot gives homeowners the tools to get it right without hiring an electrician. From solar-powered stake lights to hardwired LED systems, the options have expanded dramatically in the past few years. This guide walks you through selecting, planning, and installing landscape lighting that fits your space, budget, and skill level, so you can reclaim your yard once the sun sets.
Key Takeaways
- Home Depot landscape lighting offers three main options—solar-powered, LED plug-in systems, and hardwired low-voltage—each with different installation requirements and reliability levels suited to different budgets and skill levels.
- Before purchasing lights, plan your yard by identifying functional zones (entry, patio, garden beds) and assigning lighting goals like safety, ambiance, or accent, then sketch a rough map to prevent impulse buying.
- LED landscape lights are far more energy-efficient than older halogen systems, lasting 50,000+ hours and using only 5W–15W per fixture, making them ideal for long-term outdoor lighting projects.
- Use the 3-to-1 professional design ratio by grouping lights with one bright focal light and two supporting fixtures at lower intensity to create depth without harsh shadows or overlighting.
- Maximize efficiency by installing timers to reduce energy use by half, keeping solar panels clean seasonally, using sealed weatherproof connectors to prevent corrosion, and replacing batteries every 2–3 years in solar systems.
- Always verify utility locations by calling 811 before trenching hardwired systems, check local permit requirements, and prioritize safety by testing all connections before fully installing or burying cable.
Types Of Landscape Lighting Available At Home Depot
Home Depot stocks a wide range of landscape lighting formats, each designed for different purposes and installation methods. Knowing what’s out there helps you pick the right tool for your project.
Solar-Powered Lights
Solar lights are the easiest entry point for DIYers. They require no wiring, permits, or electrical knowledge, stake them in the ground, angle them toward the sun, and they charge themselves. Home Depot carries solar path lights (typically 12 to 24 inches tall with frosted or clear heads) and solar spotlights for uplighting trees or accent features. Most deliver 30 to 100 lumens, enough to light a path or set a mood but not bright enough for security or task lighting.
The trade-off is reliability. Cheap solar cells degrade, batteries fail after one winter, and you’ll replace them often. Mid-range options ($15–$40 per light) from brands like Brightech and Sunforce last longer than the rock-bottom discount bins. Budget solar systems also struggle in cloudy climates, if you’re in the Pacific Northwest or Northeast, a battery-powered or hardwired option may frustrate you less.
LED Landscape Lights
LED landscape lights are the workhorses. Home Depot carries two main types: hardwired low-voltage systems and plug-in string lights. A hardwired system runs 12-volt cable underground (or along fences) from a transformer, connecting to in-ground uplights, well lights, or recessed deck lights. Installation requires trenching, basic splicing, and knowing how to crimp connectors, doable for a weekend project if you’re comfortable with a shovel and a wire stripper.
Plug-in string lights and pathway kits are the middle ground: they run off an outdoor extension cord into a standard receptacle. No trenching. Cleanup is fast. The catch is the cord showing (though you can hide it along a fence or mulch line) and being tethered to an outlet location.
LED lights themselves last 50,000+ hours, roughly 17 years at 8 hours a night, and use a fraction of the power of older halogen or incandescent landscape lights. Most are 5W to 15W per fixture, and systems can run 8–12 lights on a single transformer.
Path And Accent Lights
Path lights are the most common landscape fixture: short stakes with a bulb inside, often solar or LED. They line walkways, driveways, and garden beds. Bollard lights (taller, more formal post lights) suit entry paths or defined seating areas. Spotlights (adjustable, narrow beam) highlight architectural details, specimen plants, or water features. Flood lights (wider, dimmer beam) cover larger areas. Most mid-range Home Depot path lights are solar: hardwired spotlights and floods come in low-voltage or standard 120-volt models.
Planning Your Landscape Lighting Design
Before you buy a single light, walk your yard at dusk. Look for shadows, hazards, focal points, and sightlines. Most landscape lighting fails because homeowners buy lights randomly and scatter them without a plan.
Identify your zones. Separate your yard into functional areas: entry path, seating/patio, garden beds, and perimeter. Assign a lighting goal to each, safety, ambiance, accent, or task. Safety zones (walkways, steps, driveway) need even, consistent light. Accent zones (a specimen tree, a water feature, a fence) benefit from directional spotlights. Ambiance zones (a seating area, a dining table) use softer, diffused light.
Use the 3-to-1 ratio rule. Professional designers often place lights in groups of three, one key focal light (the brightest), and two supporting lights at lower intensity. This creates depth and visual interest without harsh shadows or overlighting. Avoid uniformly spaced lights along a path: it looks institutional. Instead, vary spacing and intensity to guide the eye naturally.
Account for brightness and color temperature. Most Home Depot LED landscape lights come in warm white (2700K) or cool white (4000K). Warm white suits residential areas and gardens: it’s relaxing and flatters plants. Cool white works for security-focused driveways or workspaces. Lumens matter: a 500-lumen flood light covers a large patio, while 50 lumens suits a narrow path. Solar landscape lighting options have expanded significantly, giving homeowners proven designs and product pairings to reference.
Consider sun exposure and power source. Solar lights need 6+ hours of direct sun daily to charge effectively. If your yard is shady, hardwired LED is more reliable. Plug-in cord systems require a nearby GFCI outlet (ground-fault circuit interrupter, standard on modern exterior outlets). Hardwired systems need a transformer installed near an outlet or switched inside, another step, but it gives you the flexibility to turn lights on/off from the house.
Draw a rough map. Sketch your yard (not to scale is fine) and mark where lights go, what voltage/power source they use, and any trenching or cord runs. This prevents impulse buys and ensures you buy the right connectors, cable, and transformer size.
Installation Tips For Landscape Lighting
Installation varies by type. Here’s how to approach each.
Solar and stake lights: Remove the battery isolator tab, angle the solar cell toward the sun (usually south-facing in North America), and press the stake into soil at least 6 inches deep (so edgers and mowers won’t uproot them). Most soil is fine: rocky ground may need a hammer to seat the stake. No PPE needed, but gloves help if the ground is hard or you’re installing dozens.
Plug-in cord systems: Run the rated outdoor extension cord (12 to 16 AWG, marked for outdoor use) from your outlet along the fence, under mulch, or pinned to the ground with landscape staples. Connect the cord to the light fixtures (usually a push-in connector). Plug in and test before burying any cord. The outlet must be GFCI-protected, and the cord must not cross walkways where it’s a tripping hazard.
Low-voltage hardwired systems: This is more involved. Steps are:
- Turn off power to the outlet where you’ll install the transformer. Use a voltage tester to confirm the outlet is dead, safety first.
- Install the transformer (usually a small box) near the outlet. Screw or adhesive-mount it to a post, wall, or stake.
- Run the cable from the transformer output to your fixture locations. You can trench (dig a shallow 4-6 inch channel), lay cable along the soil surface and cover with mulch, or run it along a fence with clips. Trenching is cleaner and protects the cable, but mulch or clips work for a weekend project.
- Connect lights to the cable using weatherproof connectors (usually push-in or twist-lock). Don’t force them, they should seat smoothly. Sealant helps prevent corrosion.
- Connect the transformer to the outlet with the supplied cord. Plug in and test before burying cable.
- Backfill any trenches and secure cable with landscaping pins or under mulch.
Safety reminders: Wear safety glasses when working overhead (if securing cable to a fence or eave). Use work gloves when handling cable and digging. If you hit a sprinkler line or gas line while trenching, stop immediately, call 811 to confirm utility locations before you dig. Many jurisdictions require a permit for hardwired outdoor lighting: check your local code. If you’re not comfortable working with electrical connections, hire a licensed electrician, low-voltage systems are generally safe, but mistakes cost time and frustration.
Test everything before calling the job done. Turn on the lights during dusk, not full darkness, your eyes adjust, and a weak light looks worse at night. Adjust fixture angles so light falls where you want it, not into neighbors’ windows or causing glare.
Maximizing Energy Efficiency And Longevity
LED landscape lights from Home Depot already run circles around older technologies in terms of power consumption, but a few choices extend lifespan and keep bills low.
Use timers and dimmers. A simple plug-in timer (around $15–$25) turns lights on at dusk and off at midnight, cutting energy use in half. Smart timers let you adjust schedules from your phone, especially useful if you travel or want to shift timing with the seasons. LED dimmers are less common in landscape lighting, but if you invest in a dimmable transformer system, you can reduce brightness and power draw during certain hours.
Choose warm white for ambiance, cool white for task. Warm white (2700K) uses the same wattage as cool white, but it feels less harsh and often looks better in photos. If you’re tempted to over-light for “safety,” remember that excessive light causes glare and wastes energy. A few well-placed accent lights are more effective than a stadium-lit yard.
Keep fixtures and lenses clean. Dust, pollen, and spider webs reduce light output. Wipe solar panels every season (spring and fall) with a damp cloth. Check LED lens covers for algae growth in damp climates, a quick rinse keeps lumens where they should be.
Buy quality connectors and cable. Corrosion is the enemy of longevity. Spend a few dollars extra on sealed, weatherproof connectors (stainless steel or UV-rated plastic). UV-rated cable costs more upfront but won’t crack or degrade in sunlight, unlike bargain cord. Home improvement enthusiasts often consult design resources for inspiration on layout and fixture placement before they buy.
Replace batteries and bulbs proactively. Solar lights often fail because the rechargeable battery dies silently. Swap them every 2–3 years (late fall is ideal, before the winter dormancy). LED bulbs last decades, but if one flickers or dims, replace it, a dying LED can drag down a whole series of connected lights.
Protect hardwired connections. If you installed a hardwired system, inspect connections annually in spring (after winter expansion/contraction) and fall (before heavy rain). Tighten any loose connectors and ensure water doesn’t pool around junction boxes.