

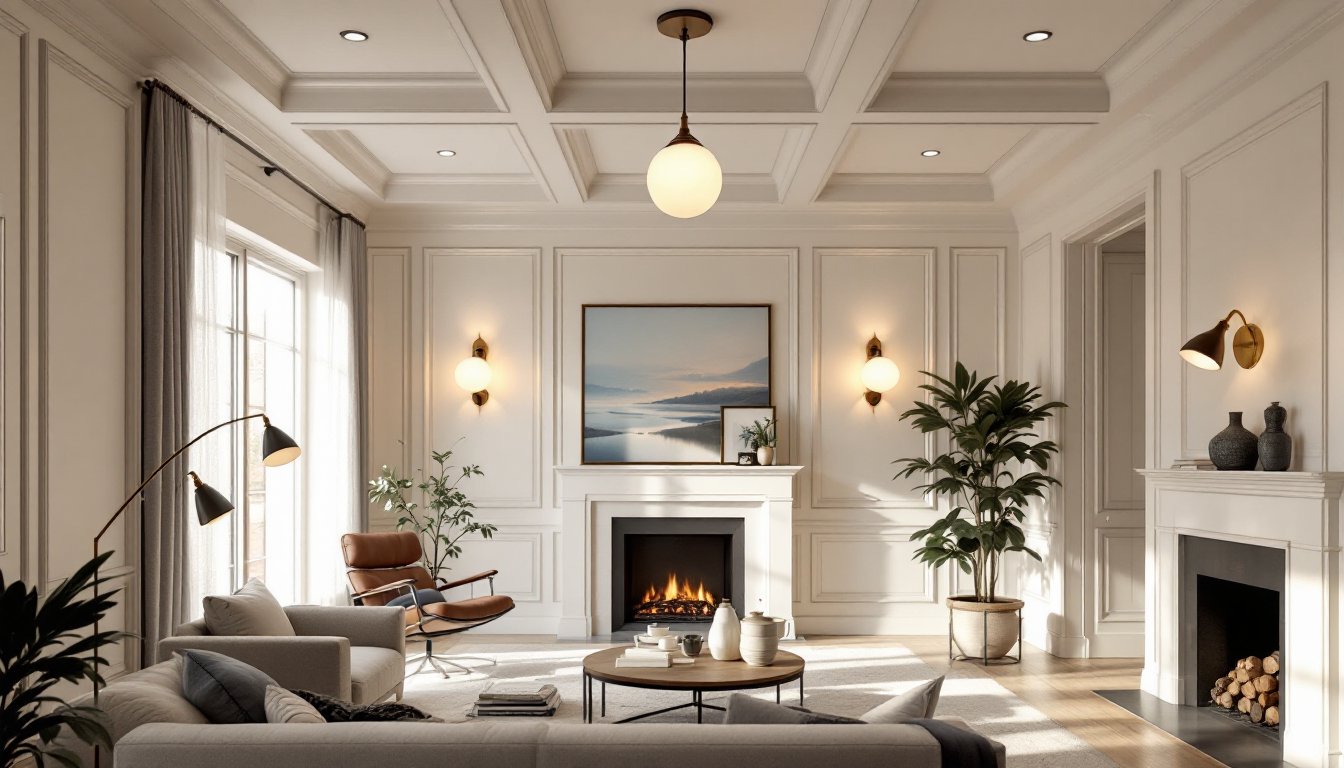

High ceilings create drama and openness, but they can also create a black hole of inadequate lighting if you don’t approach it strategically. A light fixture that works perfectly in an 8-foot room can disappear into a 12- or 14-foot ceiling, leaving your living room feeling dim, cavernous, or cold. The challenge isn’t just about choosing the brightest bulb: it’s about understanding how light behaves in tall spaces and using a combination of fixture types, placement, and layering to create warmth, functionality, and visual interest. This guide walks you through proven strategies that electricians and interior designers use to transform high-ceiling living rooms into well-lit, inviting spaces.
Key Takeaways
- Layered lighting—combining ambient, task, and accent fixtures—is the proven strategy for effectively illuminating high-ceiling living rooms and preventing dim, cavernous spaces.
- Recessed LED lights spaced 8 to 12 feet apart and installed on dimmers work best for ambient coverage in tall spaces, providing even distribution without the harsh shadows of a single central fixture.
- High ceiling living room lighting requires multiple zones of light at varying heights, including wall sconces at eye level, pendant lights hung strategically low, and floor lamps for task areas rather than relying solely on ceiling-mounted sources.
- Install separate circuits and dimmers for independent control of different lighting layers, allowing you to adjust brightness and mood based on time of day and room usage.
- Ceiling color matters: white or off-white ceilings with semi-gloss finishes reflect more light and enhance brightness perceived in tall spaces without requiring additional fixtures.
- Choose substantial fixtures appropriate to scale—group three to five medium pendants or select a large multi-tiered chandelier with a diameter of at least 16–24 inches—rather than small fixtures that disappear in the height.
Why High Ceilings Create Unique Lighting Challenges
When a ceiling rises significantly above the standard 8 feet, light travels farther before it reaches seating areas and floors. A single overhead fixture, even a large one, spreads its light over a greater volume, diluting its intensity. This is basic physics: the farther light travels, the weaker it becomes. Your eye also perceives the same amount of light as dimmer in a larger, taller space simply because there’s more empty space competing for attention.
Another issue is glare and shadows. A single centralized light source in a high-ceiling room often creates harsh shadows underneath furniture or in corners, while the ceiling itself may look overly bright or washed out. Wall color matters too: light-colored walls reflect light and make the space feel brighter, while darker walls absorb it, compounding the darkness problem.
Finally, high ceilings make it harder to light task areas like reading nooks or dining zones effectively. A 60-watt pendant hanging from a 14-foot ceiling doesn’t deliver the same focused brightness as the same fixture in a standard living room. You’re fighting gravity and distance, which means you need to think in layers rather than relying on one “hero” fixture.
Layered Lighting: The Foundation For High Ceiling Success
Layered lighting is the cornerstone of solving high-ceiling problems. Instead of one central fixture, use three types of light working together: ambient, task, and accent lighting.
Ambient Lighting For Overall Brightness
Ambient lighting sets the baseline brightness throughout the room. In a high-ceiling space, this often means multiple fixtures rather than a single chandelier. Recessed lighting (also called can lights or downlights) works exceptionally well because fixtures can be spaced across the ceiling in a planned layout, distributing light evenly. Use 6-inch or 8-inch recessed cans spaced 8 to 12 feet apart, closer spacing in high-ceilings ensures better coverage. Install dimmable LED recessed lights rated at least 3000K (warm white) to avoid a cold, institutional feel. Dimmers are essential because they let you adjust the ambient level based on time of day and mood.
Alternatively, consider wall-mounted sconces or pendant lights hung at varying heights. These create visual interest while providing ambient brightness and avoid the “all light from above” trap that makes tall rooms feel sterile.
Task And Accent Lighting For Depth
Task lighting focuses brightness where people actually use the space. Floor lamps beside seating areas, table lamps on console tables, or pendant lights above a side table all serve this purpose. Choose fixtures that direct light downward rather than spreading it diffusely. A swing-arm wall sconce (rated for about 40-60 watts incandescent equivalent) mounted at shoulder height next to a reading chair provides focused light for books or crafts without wasting brightness on the ceiling.
Accent lighting highlights architectural features or artworks. Track lighting positioned to illuminate a gallery wall, fireplace, or textured wall surface adds depth and prevents the room from feeling flat. Aim for accent fixtures with warm color temperatures (2700K to 3000K) to echo the coziness of task lighting. Together, these three layers prevent the room from feeling either too bright (if only ambient) or too dim (if you skip either task or accent work).
Fixture Types That Work Best In Tall Spaces
Not all light fixtures are created equal in high-ceiling rooms. Your choice matters as much as placement.
Recessed lighting remains the most practical option for ambient coverage. Modern recessed fixtures come in adjustable trim (lets you angle the light) and baffle trim (reduces glare), making them versatile. LED recessed lights are now the standard, they’re efficient, dimmable, and produce minimal heat. Expect to spend $15–$40 per fixture (trim and housing combined), with installation running $50–$100 per light depending on whether your ceiling is accessible or finished.
Pendant lights hung in clusters or as individual statements work beautifully when sized appropriately. A single small pendant in a high room will look lost: instead, group three to five medium pendants at staggered heights, or choose one large statement pendant (at least 16–24 inches in diameter). Keep pendant bottoms no lower than 7 feet from the floor for safety and headroom. Pendant cords are adjustable, so hang them low enough to provide task light where needed but high enough to avoid creating a wall of shadows.
Chandeliers aren’t off the table, but they need to be substantial. A small chandelier looks comical in a 14-foot room. Choose one with multiple arms and diffuse brightness across a wide area. Look for multi-tiered designs or large drum shades rather than spindly models. Hang it at least 7–8 feet from the floor if it’s in a main traffic area.
Track lighting offers flexibility. Install a primary track across the ceiling and angle fixtures to highlight different zones. This works especially well in homes with artwork or architectural interest you want to showcase. Modern living room design inspiration often showcases track systems used this way.
Wall sconces shouldn’t be overlooked. Sconces at eye level (roughly 60 inches from the floor) provide both ambient brightness and visual anchoring that helps a tall room feel cozier. Pair them with recessed lighting above for a balanced effect. Install them in pairs on either side of a focal point (fireplace, mirror, artwork) for symmetry and impact.
Smart Placement And Installation Tips
Placement strategy separates a well-lit room from one that’s merely bright.
Map your room zones. Before buying anything, identify where people actually sit and spend time. If you have a reading area, dining zone, and conversation seating, each needs its own light layer. Sketch your furniture layout and mark where you’d place task lights, ambient fixtures, and accents. This prevents wasting fixtures in unused corners.
Avoid over-relying on ceiling-mounted fixtures. Bringing light down the walls with sconces, uplights, or floor lamps fills the volume of the room more evenly than pointing everything downward. Consider uplighting, placing a fixture on a bookshelf or floor that directs light upward to the ceiling, to add dimension and reduce shadows.
Install lights on separate circuits and dimmers. You want independent control of ambient, task, and accent lighting. This requires planning during rough-in (before drywall), so consult a licensed electrician if you’re tackling electrical work. Local building codes vary, but most jurisdictions require separate circuits for distinct lighting zones. Dimmers must be compatible with your bulb type (LED dimmers aren’t always compatible with old incandescent dimmers, check specs). For guidance on high-ceiling living room design ideas, you’ll see many examples using layered circuits.
Check for obstructions before mounting. In older homes, joists, ductwork, or wiring may occupy ceiling space. Use a stud finder with a depth scanner or call an electrician to map existing systems before drilling or cutting into ceilings. If you’re adding recessed lights, ensure the space above the drywall is clear and that your installation won’t compromise insulation or ventilation.
Consider pendant height carefully. Hang pendants so the bottom is roughly 12–18 inches below the lowest point of a chandelier or light fixture. Over a dining table, aim for 30–36 inches above the table surface. In a high-ceiling room, you can hang them lower without making the space feel cramped, use the extra height to your advantage.
Don’t forget about ceiling color. A white or off-white ceiling reflects more light than a dark or textured one. If you’re painting a high ceiling, use a semi-gloss or satin finish to reflect more light than a flat finish. High ceiling living room inspiration photos demonstrate how lighter ceilings make rooms feel brighter without adding more fixtures.
Install covers and diffusers thoughtfully. Bare recessed lights can create glare and hot spots. Use diffuser lenses or baffle trims (frosted inserts that soften light) to distribute brightness evenly. Similarly, glass or fabric shades on pendant lights control glare while maintaining brightness.
Conclusion
Lighting a high-ceiling living room isn’t about finding one magic fixture, it’s about combining multiple light sources, placing them strategically, and giving yourself control through dimmer switches and separate circuits. Start by laying out your room’s functional zones, add ambient light through recessed fixtures or layered sconces, use task lighting where people gather, and finish with accents that highlight your room’s best features. With the right mix, your high ceiling becomes an asset, not a liability.