

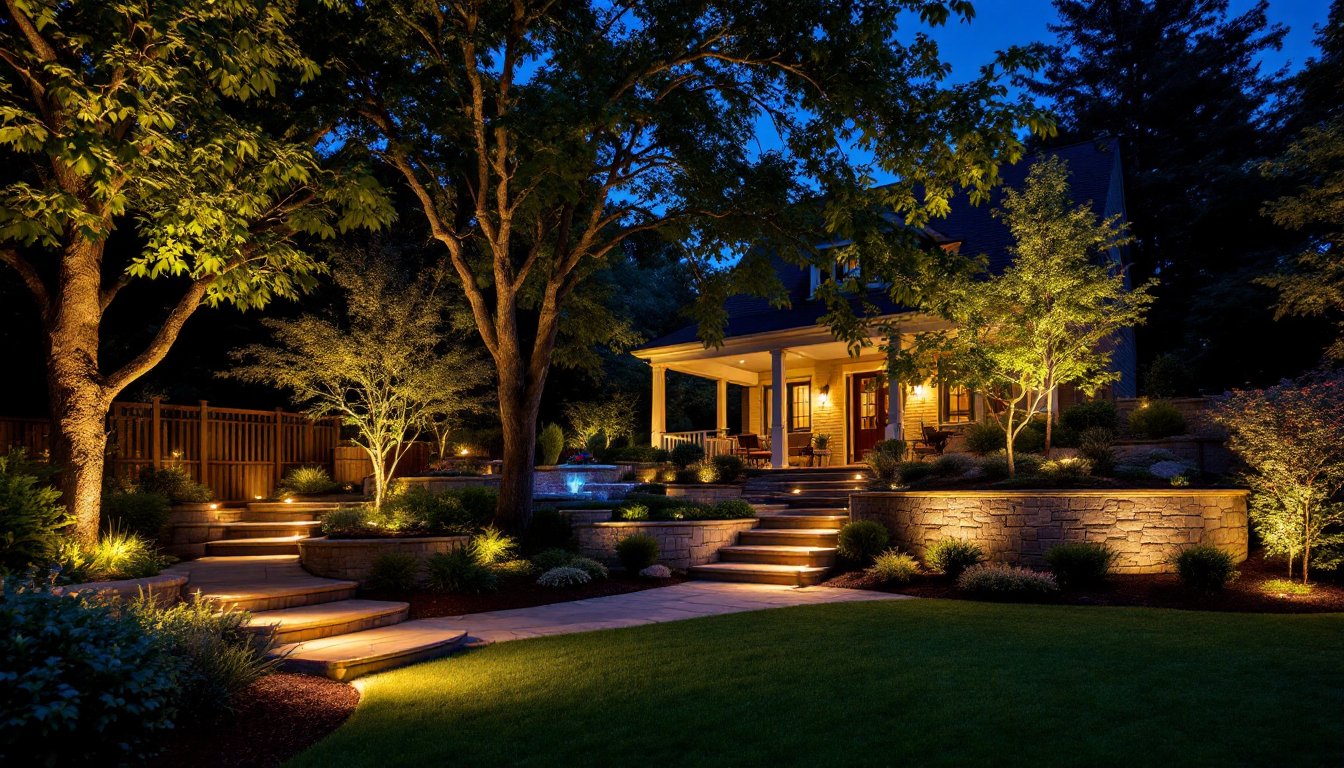

Outdoor lighting transforms a yard from a dark, unused space into an inviting extension of your home. Beyond curb appeal, landscape lighting serves practical purposes: it highlights architectural features, improves safety on walkways, and extends the usability of your outdoor areas into the evening. Whether you’re upgrading an existing setup or installing lights from scratch, understanding the fundamentals of outdoor lighting design and installation helps you create a professional-looking result without hiring an electrician. This guide walks you through fixture types, layout strategies, and installation basics to get your landscape looking its best.
Key Takeaways
- Landscape outdoor lighting improves safety, security, and home resale value while transforming your yard into a usable evening extension of your home.
- Most DIY landscape lighting systems operate on safe, low-voltage 12V power that doesn’t require permits or a professional electrician in most jurisdictions.
- Effective outdoor lighting design uses three layers—ambient, task, and accent lighting—with path lights spaced 4–6 feet apart and spotlights positioned 3–6 feet from features at a 45-degree angle.
- LED fixtures consume 75–80% less energy than incandescent alternatives, last 25,000–50,000 hours, and significantly reduce electricity costs over time.
- Warm color temperatures (2700K–3000K) create an inviting residential feel, while proper cable burial 6–8 inches deep and waterproof connections ensure durability and safety.
Why Landscape Lighting Matters for Your Home
Landscape lighting isn’t just about aesthetics, it’s a practical investment that addresses safety, security, and property value. Well-lit pathways and stairs reduce trip hazards and make your home more navigable after dark. Strategically placed lights deter unwanted activity by eliminating dark corners around your property. Studies show that thoughtful outdoor lighting can increase curb appeal and, by extension, home resale value.
The real magic happens when lighting enhances your home’s architecture and landscaping. Uplighting on trees creates dramatic shadows and depth. Accent lights draw attention to garden beds, water features, or hardscaping. Path lights guide visitors safely while adding soft, ambient light. The key is layering these effects so that your yard looks intentional, not overdone.
Most DIYers can handle landscape lighting installation because modern systems operate at low voltage, typically 12V, which doesn’t require a permit or professional electrician in most jurisdictions. That said, always check your local code. Some areas have restrictions on where you can run wiring, especially near property lines.
Types of Landscape Lighting Fixtures
Path Lights, Spotlights, and Accent Lighting
Path lights are short stakes (typically 12–18 inches tall) that line walkways, driveways, and garden edges. They cast a soft, downward glow and are the workhorses of landscape lighting. Look for models with a frosted lens to diffuse light evenly and avoid harsh glare.
Spotlights are focused, directional lights mounted on posts or stakes. They’re your go-to for highlighting trees, shrubs, statuary, or architectural features. A 75–100W equivalent LED spotlight covers most residential uplighting needs. They work best when aimed at a 45-degree angle to create dimension without washing out the subject.
Accent lights (also called well lights or in-ground lights) are recessed fixtures that sit flush with the ground or planting beds. They’re excellent for subtle illumination of low plantings or for grazing light across a stone wall. Accent lights require a bit more careful installation since they need to be level with the surrounding surface.
Rope lights and strip lights offer continuous linear illumination. These work well under eaves, along railings, or wrapped around tree trunks. LED rope lights generate minimal heat and last significantly longer than traditional incandescent strings.
Each fixture type serves a purpose. Mixing them creates visual interest and ensures your yard is functional and beautiful after sunset.
Designing Your Outdoor Lighting Layout
Layering Light for Depth and Function
Effective outdoor lighting relies on three layers: ambient, task, and accent lighting. Ambient light provides overall visibility, path lights and low-level landscape lights do this job. Task lighting focuses on specific areas like entryways, patios, or stairs where you need clear visibility. Accent lighting highlights features and creates mood.
Start by sketching your yard to scale and marking key areas: walkways, the front entrance, deck or patio, trees, garden beds, and any architectural features. Walk your property at dusk and note where shadows fall and where you’d want light. A handy neighbor tip: stand in your yard at night and imagine where you’d naturally need to see your feet or where you’d want visual drama.
Position uplights 3–6 feet away from trees or structures: too close and the light washes out, too far and the effect disappears. For path lights, space them 4–6 feet apart along walkways. The goal is even illumination without pools of darkness between fixtures. If you’re lighting a feature, a stone wall, a specimen plant, or a water feature, aim the light to graze across the surface at a shallow angle. This creates shadow and texture rather than flat, frontal lighting.
Consider sightlines from inside your home and from the street. Lights shouldn’t shine directly into windows or blind drivers. Keep fixtures low and use shields or angle them downward to minimize light pollution and glare. Many areas now require dark-sky-compliant fixtures, which direct light downward only and protect the nighttime environment.
Installation and Wiring Basics for DIY Enthusiasts
Most residential landscape lighting systems run on 12-volt DC (direct current) power, which is much safer to handle than household 120V. A low-voltage transformer converts standard household current to 12V. These transformers typically mount to an outdoor outlet or garage wall and cost $40–$150 depending on wattage capacity.
Before you dig, check your local call-before-you-dig service to mark buried utilities. Running cable near gas or electric lines without checking is dangerous and costly. Use direct-burial cable rated for outdoor use: standard indoor wire will degrade quickly in the sun and soil.
Run cable along pathways, fence lines, or under mulch to keep it hidden and protected. Bury it 6–8 inches deep or lay it under a 1-inch mulch layer. Avoid running wire through areas where you’ll be digging or tilling later. Keep loops and slack so you can adjust fixture positions without rerouting wire.
Connect fixtures in series or parallel depending on your transformer’s specs. Series wiring is simpler, daisy-chain each light to the next, but voltage drop increases over long runs. Parallel wiring maintains voltage but requires more complex wiring. Read your transformer manual: most consumer systems use series.
Once everything is wired, test the system in daylight before burying cables. Seal all connections with waterproof connectors and apply a dab of silicone caulk around the connection. Power the system on and walk your property to check for dark spots, glare, or fixtures pointing the wrong direction. Adjustments are easy now: they’re a hassle once everything’s buried.
Safety note: wear gloves and eye protection when digging and installing fixtures. Use a spade carefully to avoid nicking your own wiring or gas lines.
Choosing Energy-Efficient Lighting Solutions
LED outdoor lighting has become the standard for good reason: LEDs consume 75–80% less energy than incandescent or halogen bulbs, last 25,000–50,000 hours, and run cooler. A typical 12-watt LED path light produces the same brightness as a 50-watt halogen fixture. Over a season, that difference adds up on your electricity bill.
When shopping, check color temperature measured in Kelvin (K). Warmer lights (2700K–3000K) create an inviting, residential feel and blend well with landscaping. Cooler lights (4000K–5000K) look clinical and are better reserved for security or task lighting. For landscape design, stick with warm tones unless you want a modern or contemporary look.
Consider smart outdoor lighting systems that let you schedule lights to turn on and off automatically or control them from your phone. Many come with dusk-to-dawn sensors that eliminate manual switching. A timer module costs $20–$50 and pays for itself in energy savings within a season or two.
Solar-powered path lights offer zero wiring hassle, though they’re less reliable in cloudy climates and won’t run as bright as low-voltage electric lights. Use them as an inexpensive supplemental option, not your primary system. Low-voltage electric lights give you more control and better performance.
For budget-conscious DIYers, comprehensive guides to uplighting in landscape design break down how fixture placement and selection work together. Prioritize lighting for high-traffic areas and architectural features first, then expand as budget allows. A modest 6–8 fixture system installed thoughtfully beats an expensive sprawl of randomly placed lights.